


There are a lot of different categories or genre for Photography. I have devoted a chapter to each of the most popular ones. I have also covered the rest of them briefly in Chapter Ten. In this chapter I will discuss four genres, ones I call niche genres. Film( imagine that, film has fallen to a niche category), infrared, high speed capture and B/W photography. I have decided to devote some time to this last one, mainly because of the misconception on how to shoot B/W Photography in the digital age. It will be the last section in this chapter.
A Beginner’s Master Guide to Film Photography

Film photography doesn’t have be intimidating.


What is Film Photography?
Film photography is where it all began. Before the birth of digital photography, we all took photographs on strips of plastic with layers of emulsion. Further back from that, we used glass and metal sheets which played both the role of light carrier and print.
These strips come with a coating of a silver halide solution, protected by a layer of gelatin. The photographs we took burned an imprint into the silver.
To get a negative out of this, chemicals and washes stripped the plastic of all its coating. This reveals a reversed image.
Dark areas of the scene would show up as transparent on the negative.
The grain or ‘noise’ we see from higher ISOs come from the size of the silver pieces.
The bigger the pieces, the better they were at capturing light but that also meant they were big enough to see.
Film photography is all about having a physical element with the possibility of experimentation. It relies on the process of conscious image-making because you have a limited number of frames. It is also time-consuming due to the developing and scanning process.
These days, film photography is making a huge comeback. There are plenty of reasons why you should shoot film. There are a lot of online communities, collectives and groups on social media. You can even find hashtags like #filmisnotdead where people are aiming to bring film photography back to life.
Film Photography Vs DigitalYou don’t really need me to tell you the difference between analogue and digital.
We see it all the time with music and film. Film came first, then the digital revolution followed. Digital cameras were built on the exact mechanic of SLR’s.
The biggest advantage of film photography is that it offers you a way to learn. Most analogue film cameras are fully manual. This means you have to change all the settings yourself.
There are many disadvantages, but these only make sense when comparing to the DSLRs of today.
The quality of your negatives can surpass your DSLR if you have the right camera and scanner.
What analogue photography offers you are a plethora of great cameras to choose from. These cameras are specific to their time and their location. There are also great lenses which you can even mount on DSLRs with adapters.
A Japanese camera like the Mamiya is very different from the Russian Zenit. Different feel, different sound, different outputs.
Digital cameras don’t have a look about them, nor do they have a feel of a culture or a time. And they do not last nearly as long as film cameras. Read our article for the other seven reasons to go analogue.


The benefits of film photography are what got people shooting in the first place. Back in the day, scientists and documenters used the camera as a tool.
Then, the cameras found their way into the hands of studio photographers, documenters and artists. Without film photography, digital photography would not have been born.
Likewise, Adobe Photoshop was born from struggles that Thomas Knoll found when dodging and burning in the darkroom.
Film photography still offers a lot of choices. Many different types of film give you different looks in the real world. And you don’t ev.en have to use presets in Lightroom to mimic the unique looks
This is the opposite of splashing them all over Instagram.
Many photographers use digital to capture their street photography images. There are still a few who prefer to use film for all street activity.
There are a few reasons for this. Not only does film offer a hands-on product. It is also very forgiving in the way it captures highlights.
There are some great cameras that only work with film. For example, the Mamiya C330 TLR. This style of medium format works well for candid captures.
Whatever the reason, there are some genre’s of photography that work well with film. One of those is street photography. I have already discussed that genre in a previous Chapter so I won’t discuss the subject any further here. B&W photography is another one, since there are so many good films out there. It was also the most forgiving film on the market, so it was a great film for new photographers.
General Tips for Film Photography
Film photography is different from its digital counterpart in many ways. One of the biggest differences comes in how we expose a scene.
With film photography, it is better to overexpose. It is easier to bring the exposure down later. You are able to push or pull a film if you would like to change the exposure while developing.
In digital photography, the opposite works better. Underexposing a scene allows you to pull details out of the shadows.
Are you a photographer who likes using film? Perhaps you aren’t exactly sure why. The hands-on approach is very alluring.
If you think you’re alone, you couldn’t be more wrong. There are many photographers out there who still use film. There are many communities out there to join and follow.
How To Choose your First Film Camera
It is at the intersection that one can find a great image. It comes down to a photographer’s skills and their camera’s ability.
Neither one can operate without the other. Luckily for you, there are many cameras that you can buy cheaply. There are even cheaper second-hand options. Even though the camera body is important, you should get a good lens first.
We’re all beginners at first, no? Film photography is an exciting practice of patience and intention. Shooting film has enabled me, as well as many other photographers, to slow down and create purpose and meaning behind each image. It’s much easier to continuously press the shutter without fully reeling in your composition or framing. But with film, each roll forces you to think twice about the photograph you are trying to create.
So, how does one get started in film, and what kind of camera are good for beginners and the functions or features of each? Well, let’s start with some basics of buying, then we’ll further assess a list of cameras for those starting out but don’t know where to look.
What do you want to shoot?
This is the primary question to ponder.The type of shooting you’re looking to do will highly depend on the camera you should choose. You must also consider the type of format you’d like to shoot in, which brings us my following point.
The great thing about film photography is that there are still so many different types of film to use.
The downside of film photography is also the overwhelming amount of choice. And the choice can be daunting.
The questions you first need to ask is 35mm or 120 (medium format film)? Colour or black and white? Low or high ISO?
The Difference Between 35mm and 120 Film Formats
There are two types of cameras that take different film stocks: 35mm and 120 film (medium or large format) film. 35mm is much smaller and typically less expensive than 120 film, meaning they are more portable but hold less space for details and resolution. Because 120 is a larger format, this means that each roll only holds 16 shots or less instead of the usual 36 on the 35mm film canisters. It’s definitely a bit more cumbersome to add 120 film to your camera bag, but the output can be very worthwhile.
If you’re truly just starting out your film journey, I’d highly recommend beginning with a 35mm camera; they are less technical yet still deliver a beautiful image should you shoot the roll properly.


Where and What To Buy
You can typically buy the more expensive, modern cameras at any branded cameras shop, like Leica, Canon, or Nikon. However, if you’re looking for more old school / vintage options, then eBay, Etsy, or Craigslist are excellent options. The one thing you MUST look for when purchasing an older or even slightly used camera is to ensure with the previous owner or manufacturer that the camera works.
Instant / Disposable Cameras:
Instax Mini 11
Instax Square SQ1
Lomography Lomo Instant Wide
Lomography Diana Instant Square
Lomography Lomo’Chrome Purple Simple Use Camera
Any Kodak Disposable at Walgreens or CVS
Point and Shoot Cameras:
Lomography Diana Mini and Flash
Lomography Lomo LC – Wide 35mm Film Camera
Contax T2
Contax T3
Olympus Infinity Zoom 80 QD 35mm Film Camera
Canon Sure Shot Tele 80 35mm Film Camera
35mm Cameras:
Canon AE-1
Nikon FE2
Olympus OM 1
Pentax K1000
Nikon FM
Holga 120N
Minolta SRT-101
120 Cameras:
Mamiya 645
Pentax 645N
Minolta Autocord
Mamiya RB67
Holga 120
Picking the Right Film
Now that you have your camera of choice, you’ll need to discover which film stocks are the best for you, your style of work, and the appropriate lighting condition in which you’ll partake.
Kodak Professional Portra 160 – The Versatile Light Range
Kodak Professional Portra 400 – The One With Perfect Skin Tones
Kodak Professional Portra 800 – The Low Light Compatible
Kodak Professional Tri-X 400 – The Black and White Details
Kodak Professional Ektar 100 – The Vibrant and Colorful
Kodak Gold 200 – The Golden Warmth
Kodak Professional Ektachrome E100 – The Experimental
CineStill 500 D – The Cinematic Tones and Dark Features
Fujifilm Superia X-TRA400 – The Purple Tinted Majesty
Fujifilm Pro 400H – The Lightest and Airiest
Ilford Delta 400 – The Finest of Detail for Panchromatic Images
Ilford HP5 Plus – The Stark Contrast and Bright Highlighter
A quick lesson on terminology:
ISO – The sensitivity rate at which light is rated at. This is also often referred to as film speed.
Stop – A stop of either doubling or halving the amount of light let in when taking a photo.
Push – Doubling the amount of light be 1,2, or 3 stops.
Pull – Halving the amount of light by -1, -2,-3 stops.
When shooting, you’ll need a camera that will allow you to manually change your ISO. Simply set your camera to the despired camera speed (something different than the film speed) and shoot the film as you normally would. The rest is done with your development lab.
Rating Film
Rating film is basically just overexposing your film roll, at the time of shooting, to give the roll enough light. That’s why a lot of Fuji wedding shooters have that notorious light and airy vibe, it’s because they rate their color film to exactly what they want.
Most film stocks need more light than what their box speed recommends. Box Speed simply refers to the ISO each film roll’s manufacturer recommends shooting your film at. You can typically read the ISO number within each film rolls’ name, like Kodak Professional 400 ISO box speed holds an ISO of 400.
For example, rating Kodak Professional 400 box speed film at 100 ISO is the same as overposing the whole roll by two stops (highlighted in the aforementioned section), because you are essentially slicing the box speed in half, twice.
But how will rating the film stock differently affect the look of my images? Various types of lighting conditions will give you a multitude of different exposure results, so it’s important to read the light situation of your scene to determine your rating outcome. In poor light, you might need to overexpose than you normally would to maintain fine exposures and color tones.


Photographing on film is an old-school way of capturing moments. Its popularity is constantly increasing in the last decade. As it is the foundation and the only real physical form of photography, film photography is an irreplaceable technique.
Which Camera Settings Should You Use
Film photography is much more difficult and challenging than digital photography.
You need to know your camera inside out, the scenes’ abundance of light and what your film can do.
This cheat sheet runs through three main things. Film speed (ISO), aperture (f/stops) and shutter speed. All three of these things work co-dependently.


Basic Camera Settings
Your camera settings for film photography are going to be familiar. They are similar to what you would use for digital.
There is no difference in the tool you use to capture a scene. Both cameras come down to utilizing the three fundamental basics of photography.
Aperture, ISO and shutter speed make up the exposure triangle. They allow you to capture a scene.
Knowing how to use these three elements manually will help your film photography.


Master the Sunny-16 Rule and Other Exposure Settings
We looked at handheld light meters in a previous topic. But if one isn’t available then there is another way.
The other option you can use is adopting the Sunny-16 rule. This rule works at noon when the sun is at its highest.
The first setting in you should choose in sunlight is f/16. The shutter speed should be set as close to your ISO as possible. For example, f/16, ISO 200, gives you a shutter speed of 1/250.
The benefit of this system is that you don’t have to keep those settings. They are just a good base to work from.
If you wanted to move your aperture down 5 stops to f/2.8, then your shutter speed needs to go up 5 stops.
This is light compensation as the smaller aperture adds light, and the increase of the shutter speed takes it out again. Keep it sunny.

Tips for Darkroom And Developing
Film Developing Tank
It’s not only easy to process your own negatives at home, but it’s also a lot of fun. The anticipation builds as you follow a few easy steps.
First off, you need to find a way to get the film out of its canister. Next, put it into a developing tank. This happens in pitch black as the film is still sensitive to light.
Once the film is in the developing tank, you need a developing chemical called ‘developer’. Then, water and another chemical called ‘fixer’.
The developing tank holds your film and allows the chemicals to work on it. By agitating the chemicals one by one, you turn the film into a negative.


Building a Low-Budget Darkroom
A darkroom is where you process your negatives into prints. A negative is a reverse image of the scene you had captured.
The blacks are whites and vice versa. The negative acts as a template that allows light through it and onto light-sensitive paper.
These negatives are repeatedly used any number of times. Thank god, as you never get the exposure right the first time.
A dark room needs to consist of two areas. One for dry processes and the other for wet ones.
The dry areas are where an enlarger exposes your negative on to the paper. The wet area is where you process and wash your paper with chemicals.
This article gives you all the information you need to know how to build and operate a darkroom.


During the age of film the Kodak Pocket Guide was an invaulable ool for photographers.
How To Develop Black and White Film Photography at Home
Printing your first black and white image is an experience you can’t explain. All the hard work and training has lead right to this point.
The basic idea is that you take your negatives into the darkroom and place them into the enlarger.
This expands the projected image that falls through the negative. The light-sensitive paper picks up the different intensities of light and produces a positive print.
You can see this after you process the print in the developer chemical.
All the information you need is right here, in our article.

How to Experiment With Film Photography
An Introduction to Pull and Push Film Processing
Pushing and pulling film refers to up- and down-rating your film to higher or lower exposure.
This can happen during the photography stage or the printing stage.
When you are pushing the film, you let your film stay longer in the developing bath.
On the other hand, pulling is to stay less in the bath. There are certain measures for that depending on the film and the chemicals. But every information you need is written on the film/developing liquid.


Expired Film Photography
Using expired film has become a very trendy and popular way to photograph for a few years now. This is because the expired film presents colour shifts.
The effects of heat and background radiation cause gradual, inexorable damage. But extending their lives is as simple as sticking them in a fridge.
Or, even better, a freezer. Freezing a film extends its life by decades.
These colour shifts add those interesting filter-esque tints and colour tones. These are the ones that are more present on Instagram processed images.
The best thing about them is that there is no way of telling how much the colour has changed and shifted.
Also, each different film type presents you with a different shift in colour. Sometimes you buy one and you end up with terrible pictures. It’s all about trial and error, which makes the whole process very interesting.
Positive Paper
Photographic film starts as a negative. This is the reverse of the captured scene. It becomes reversed again when printed from an enlarger.
A negative creates a positive print. Positive paper exists. This allows you to capture a scene as it is, where you skip the enlarging of the image.
This is something that you can use with large format cameras and pinhole cameras.
Read here on how you can get hold of this paper, and how you can use it.
Double Exposures
Double exposure is a process of layering two images on top of each other. This can happen either in the photographing, developing or even the printing stage.
Some cameras, such as the Mamiya C330 TLR (twin lens reflex) have an inbuilt option to create many exposures. Or with certain ones, you can manually expose the film as many times as you want by not sending the roll towards.
Not every camera rolls automatically the film onto the next negative. For most 35 mm film cameras, there is an easy way to create double exposures.
The things you need to think of when creating a double exposure are all here, in our article.
DIY Film Photography
DIY Light Box (How to Make Your Own Photography Light Box)
If you are one of those awesome photographers that still shoots on film, a lightbox is a necessary tool.
A lightbox will help you look at your negatives closely. This is great for the pre-selection process before printing or scanning. It will save you time.

Handmade Cameras
If the experimental side of things interests you, this post is for you. You will see a few photographers have taken it upon themselves to create their own cameras.
They created their own devices to fit their style. From it, there are a few unique capturing devices out there.
This is a great way to add interest to your work as no one has the same tools capturing the same things.
Read here on a few possibilities and hopefully, it gets your creative chemicals running.Alistair Thain
How to Digitalize Film
How to Find the Best Film Scanner for Photography
Even though you love the analogue aspect of film photography, you might still want to digitalize your negatives. This ensures that you have a copy of your negative.
It also allows you to post-process the negatives further. Working with programs such as Lightroom allows experimentation with layers and local adjustments.
A digital version of your image allows you to share your shot on social media. It also lets you decide whether you wanna do a physical print developed from it. When it comes to film photography, a scanner is your best way of getting your images onto your computer.
Read here on how we recommend you digitalize your film photography.
VueScan is a program that allows you to scan and digitalize your film photography. This software is available for both PC and Apple systems.
It is important to find joy in the processes behind film photography. You will have to do mundane tasks repeatedly. Scanning in your negatives is one of these tasks, so you have to make it enjoyable.
If, like me, you don’t like the operating program that comes with your scanner, give this software a try.


How to Digitalize Film Photos
Digitalizing your processed negatives have many benefits. for one, it means you don’t need to mess around with a darkroom.
This is something that some companies and labs can do for you. If you already have a scanner, you can do it yourself as it is cheaper this way.
Read our article here for the step-by-step guide. This will ensure no problems arise, and you can digitalize your images as fast as possible.

How To Create a Film Photography Look in Lightroom
If it’s the film look you are after, you don’t have to shoot on film. There are many processes you can use to replicate it.
Our article here shows you how to obtain that atmosphere of an image shot on film by using Lightroom. It’s all about the local adjustments.
Why should you do it in Lightroom? Well, it saves the hassle of shooting on film in the first place. You can also use presets to achieve a film look.


Conclusion
Film photography involves loads of physical processes that need research and practice. It is also an amazing way of getting in touch with the origins of photography.
We hope that we could help you with these processes and that our tips motivate you to utilize the full potential of film photography.
Many years ago I developed some of my own film in my darkroom. I actually had two darkrooms. Unless you are going to only shoot film, I would not bother with developing your own film. It just is not worth it the cost and time to do it. Especially when the resources are so limited. While I still have film cameras, I only shoot film once every couple of years. I just send it out to get developed.
GUIDE TO INFRARED PHOTOGRAPHY
If you’re looking for a new way to represent your subjects, then infrared photography (IR) might be the right move for you.
The great thing about IR photography is that it allows you to show things in a way that nobody sees, and isn’t that what creative work is all about?


Do you want to capture haunting infrared pictures like the ones featured above?
Well, you can – and it’s not even hard. Infrared photography is an easy technique that can give you breathtaking, otherworldly results, and it only requires a simple filter (plus a little technical know-how).
What Is Infrared Photography?
Infrared photography uses infrared light to expose photos, a form of electromagnetic radiation that lies below the visible spectrum. Humans cannot see infrared light, but camera sensors can, and this IR sensitivity can be used to create images.
To elaborate on that: photography is done by capturing the light that bounces off the objects in front of the camera.
This can be done using a digital sensor or a light-sensitive film. ‘Regular’ photography captures the same type of light that we see.
Infrared photography is able to see and register IR light that’s invisible to the human eye. This is done either through specially made film for analog (film) SLR cameras, external IR filters for DLSR cameras, or with digital cameras modified to capture this part of the light spectrum.
Using any of these means, you can recreate very unique visual recreations of IR light. The resulting effect can be very different from the way you see things, which makes it highly appealing for its creative potential.
That said, cameras aren’t well-equipped to capture infrared wavelengths – after all, they’re designed to use visible light, not IR light! – so infrared imaging requires special filters or adjusted camera sensors.
To understand this a bit better, let’s talk about light for a moment.
What Is Infrared Light?
I’m not going to be too technical, but as you probably know, light is made out of electromagnetic waves. Within that electromagnetic spectrum, you find different types of light according to the wavelength.
The human eye can perceive only the portion of the light spectrum that has a wavelength ranging from 400 to 700 nanometers. This is known as visible light; anything outside of that range is invisible to the naked eye.
Infrared waves are between 700+ to just a bit over 1000nm across (1 millimetre). This means that their upper-frequency end is just outside the limits of human perception.
Just so you know, below 400nm you find Gamma rays, X-rays, and Ultraviolet light. Then, after the visible light (therefore over 700nm) there’s IR light, Thermal Infrared, Microwaves, Radio, and TV waves.
When you capture an infrared photo, the result usually looks like this:


It’s interesting, but not what most photographers are after. However, with a little post-processing, you can achieve a beautiful infrared look:

If you’ve encountered infrared images, you’ll immediately notice that the look stands out – and while some find it rather eerie, others are intrigued by the way the IR look can transform the ordinary.
What Is Infrared Photography Used For?
Infrared photography can be used for all sorts of things, both technical and artistic. One common example is military use.
IR photography can more easily distinguish between camouflaged buildings and natural vegetation, or between bodies of water and dry land.
NASA is known for using digital infrared photography too. For example, they superposed an infrared false-color image onto an image of the Sombrero Galaxy taken with optical light in order to see its glow.
Infrared images also have a medical application to detect health problems such as tumors or peripheral nerve diseases. They’re also useful for dental imagery.
With an infrared camera or infrared filter, you can also execute technical art examination because certain pigments are sensitive to infrared light.
Then, of course, there’s the creative use. For example, photographer Sandro Martini uses IR photography to capture his images as if they were fine-art paintings.
How Do You Take Infrared Photos With a Digital Camera?
The first question most people ask when it comes to infrared photography is, “How do I take infrared photos with my DSLR?”
Fortunately, this isn’t hard to do.
However, for most DSLR cameras (or mirrorless models), you can’t just go out and take IR photos right off the bat. A few options have to be considered first and all of them require certain external gear.
To shoot infrared photos, you’ll need standard photography equipment – a camera and a lens – but you’ll also need to create the infrared effect, which you can do in one of three ways:
- With a professionally converted infrared camera
- With an infrared filter
- With infrared film
1. Get the Right Gear
Depending on how you’re doing your digital infrared photography, you might need different things.
Converted Infrared Camera
If you’re really serious about infrared photography, the best gear that you can get is a converted camera (or you can convert the one you have).
As far as I’m aware, no DSLR or mirrorless manufacturers produce infrared cameras, but you can send off a camera body to be converted by third-party companies. Alternatively, you can buy an already-converted IR camera used on eBay or from an IR-conversion dealer.
The sensor in your camera is already sensible to infrared light. However, manufacturers put a filter to block those wavelengths. This way the quality of your images with visible light is better.
This IR blocker can be replaced professionally with an infrared filter converting your normal camera into an IR camera.
There are two downsides to this decision though: it’s expensive and it will be permanent. You cannot use that camera for regular photography again.
There are some cameras where you can get around this invasive procedure and still take infrared photography with your digital camera.
In some cases, the infrared light can still reach the sensor when it’s exposed for long periods of time.
How to check if your camera can be converted to Infrared
To find out if your camera is susceptible to these light waves, point your TV remote towards the camera.
Then, activate the Live View and see if you can see the light coming off the remote when you press a button on it.
Safety note: don’t look directly at the light nor look through the optical viewfinder.
If you can see light from the remote, you can use your digital camera for infrared photography without any conversion. You will only be able to do it through long exposure times though.
Note: Once a camera has been converted, its sole use is infrared photography; you cannot take regular images. So buying a dedicated infrared body involves purchasing a second camera body (unless, of course, you want to fully dedicate yourself to infrared!).

Infrared Filters
A more affordable option for shooting an infrared photo is with a special IR filter that you can attach to the front of your lens on your regular camera.
These filters block the visible spectrum of light and let the IR light come through. Each IR filter comes in different sizes, types, and prices.

Different types of filters capture different portions of the IR spectrum with distinct visual effects of each kind.
For example, the Hoya R72 filter blocks any light that has a wavelength under 720nm and lets in the 760nm – 860nm infrared spectrum. This is one of the most popular choices.


However, for photographers who prefer black and white, a better choice is the B+W 093 IR filter 830 because, as the name says, it blocks anything under 830nm. This way the image becomes highly contrasted.
So, when you choose the filter you want to buy, don’t guide yourself only by price, instead, focus on the specs to understand the type of effect you would get.
Note that different filters render color differently, depending on the specific IR and visible light ranges they filter in and out, so the results are inconsistent from filter to filter; this can be frustrating if you want your IR photos to look like everyone else’s, but the silver lining is that you can experiment with different filters until you find one that suits your vision.

Tripod
As discussed previously, unless you’re using a converted camera, you’re going to be dealing with pretty long exposures.
Because of this, a tripod is unavoidable. Since you’re talking about 10, 20, or 30-second exposures, the tripod needs to be very sturdy – choose a tripod that’s designed for a DSLR, rather than a flimsy lightweight travel one.
Of course, high quality comes with a high price tag and a fair amount of weight. This last one is an important consideration if you’re planning to do landscape photography in places where you have to arrive on foot.
In any case, take all three factors into consideration and buy yourself a tripod for your infrared photoshoots.
2. Choose the Right Subject
Most of the time you’ll see landscapes being featured in infrared photography. This is because they render a more appealing result.
The chlorophyll contained in leaves makes trees, forests, or fields glow when captured with infrared light. That’s why nature scenes can make a spectacular infrared image.
If you pair this with the darkness of the sky that will absorb most of the infrared light, you’ll get pretty dramatic images.
That’s why landscape photography is the most common subject for infrared photography, however, you can also get pretty amazing results with architecture.
If you want to use human subjects for your IR photography, you can do that too. People will become very white giving them a ‘ghostly’ vibe.
As you can see, infrared photography can be used to capture any subject you want.
The most important thing to consider when you’re choosing your subject though, it’s that it will be shown in a different way to what you’re used to. That gives you a lot of creative potentials.
For some inspiration, you can look at any of the artists that use infrared photography for their work. For example, check out the photo series “Infra” from Richard Mosse or Paolo Pettigianni’s “Infrared NYC“.
3. Wait for a Sunny Day
While you would normally want to avoid shooting at noon on a bright sunny day, this is actually the best condition for infrared photography.
Forget the golden hour for landscapes or the cloudy days for portraits, as these won’t be good enough for this technique.
You need the sun to be shining to have lots of infrared light. This is also very helpful if you’re shooting with an infrared filter because the exposure times might not be so extreme.
Now let’s take a look at those all-important camera settings for nailing stunning infrared photography.
4. Dial In Your Exposure Settings
Selecting the perfect IR camera settings involves a lot of trial and error, and while nothing beats proper experimentation, here are some guidelines to get you started.
RAW and JPEG
When you’re starting out, shoot both RAW and JPEG files. You won’t be capturing thousands of shots, so space shouldn’t be an issue, and RAWs and JPEGs each offer valuable benefits.
On the one hand, RAW files give you the most scope when processing (and infrared photos do require significant edits). A RAW file will let you recover blown out highlights and clipped shadows, which is essential for infrared photography, as the right exposure settings can be tough to nail down (more on that later!).
On the other hand, JPEGs are easily viewable, so you can see the results of your infrared photos on your computer screen without any processing.
It’s important to emphasize, though: Straight-out-of-camera infrared photos look horrible. At first, you’ll probably be turned off by their flat, pink appearance – but over time, you’ll get used to it, and you’ll soon develop the skills to identify a good IR image from a bad IR image at a glance.
The exposure settings you’ll need for your IR photography will vary greatly depending on the camera you’re using (i.e., if you’re using a converted camera or a normal one with an IR filter).
They’ll also depend on the lens and the light conditions of your particular scene. There are some tips that can help you out though.
First of all, you should set the image format to RAW. This way, you’ll have more flexibility in your editing. If you also want to take JPEGs that’s up to you.
If you’re using a normal camera, you need to consider that IR filters are extremely dense so you will be losing a lot of light.
As a result, you’re going to need a slow shutter speed to make very long exposures. If the time is too long and your subject is coming off a little blurry, try compensating with other settings.
Whenever possible, keep the ISO on a low value to keep digital noise to a minimum.
As far as the aperture goes, there are two theories when it comes to IR photography. Some photographers advise shooting with a wide aperture to minimize the shutter speed time and ISO value. This will also diminish flare problems.
Others say it’s best to take your photos with a smaller aperture, f/8 for example, to keep your images sharp.
My recommendation is that you experiment with your own gear and see which one works best for you.
5. Dial In Your White Balance
The white balance of your camera is calibrated to the visible part of the light spectrum. When you go out of it, as you do with infrared photography, you can’t use any of the preset modes that you have.
Fortunately, there is a mode called Custom White Balance and that’s the one you’re going to need.
So, point your camera to the ground and frame only grass. It’s important that everything in the frame is green. Adjust to the correct exposure and take a photo of it.
You can also do it with leaves on a tree but it’s more difficult to get even lighting, that’s why the grass would be better.
Then, go to the white balance settings in your camera and set this image as the source for the custom white balance.
6. Be Aware of Potential Problems
There are some additional issues that you have to deal with when you do IR photography. Nothing that can’t be fixed, but you do need to be aware of them to avoid disappointing results.
Focus
Focusing subjects under natural light might not result in sharp subjects when you capture them with infrared light.
If you’re using a modified camera, they probably adjusted the difference in focus when they did the conversion.
In that case, you’re probably OK, but it’s best to double-check with the company if it’s part of the service they offer. Color infrared film won’t present a problem either.
However, if you’re shooting with a normal digital camera using infrared filters or black and white infrared film, you will need to adjust the focus.
Many lenses have an indicator to compensate for the different focus – you have to use manual focus for this. If your lens doesn’t have it, you can try focusing with live view and some trial and error.
Exposure
When you’re exposing for infrared photos, all common wisdom goes out the window. You can’t trust your camera’s meter, you can’t trust handheld meters, and you’ll simply need to take some test shots, preview the results on your LCD, and keep going until you get a good result.
Infrared filters require extremely long exposure times; they block out visible light but don’t let any extra infrared light through, so on a bright sunny day, you’ll often work with exposure times between 30 and 120 seconds (assuming you’re shooting at f/8). Here, a tripod is essential.
If your camera is infrared converted, your settings will be much more standard. On sunny days, you might shoot at f/8 and 1/125s, though the settings will vary depending on the light.
Whether you use a filter or an IR-converted body, review your photos constantly, especially in the beginning. As soon as you’ve taken a shot, check the LCD and view the image histogram. You might consider bracketing your photos to increase your chances of capturing a nice exposure.

Trying to use the exposure meter from your camera or even a handheld meter won’t be very helpful during infrared photography. All normal gear is calibrated for visible light and therefore won’t be accurate if you’re working with lightwaves from outside that spectrum.
Just do some trial and error shots to determine the correct exposure. Once you have it, do some bracketing.
This is recommended because the image from the LCD screen can be misleading – especially if you’re a beginner and you’re not yet used to seeing and assessing infrared photography.
Hot Spots
A common problem with infrared photography is the hot spots that result in your images from the light flare.
There are certain lenses that work better for infrared photography. You can do some research to find the best ones as these will give you fewer problems.
Another thing that you can do to avoid or diminish the hot spots is to cover the optical viewfinder when you take the picture.
Some camera straps (see guide) come with a special piece to do this; if not you can just cover it with your hand or a piece of cardboard. Then, try to use a wide aperture, as you would do to diminish any type of flare.
Finally, you can get rid of the hot spots in post-production.
How Do You Shoot With Infrared Film?
Credit: Wrev. The Ribeira da Janela Valley on Madeira Island, taken on Infrared False-Color Film (Kodak EIR).
Unlike digital photography, analog film cameras can be used for infrared photography. You just need to use an infrared filter and load them with infrared film.
There are two types of film: black and white infrared film and infrared color film. Black and white IR film is still available on the market.
Color IR film is no longer being produced. Maybe it will go back on the market in the future if there’s enough demand for it, but that’s not yet the case.
You can find some expired rolls for sale, but they’re not common and probably won’t be cheap either.
To develop any of these films you might have to ship your rolls to a lab outside your city (or your country) because not many offer this service.
How Do You Make Infrared Photos Using Your Smartphone?
Smartphone camera sensors are sensitive to infrared light, so you can use them with an IR filter. However, you might have to DIY an accessory to mount it because there aren’t any filters on the market especially for smartphones.
You can also use apps to simulate different infrared effects for your camera or to apply filters to your photos.
How to Edit Infrared Photos (Post-Processing)
As previously mentioned, when you shoot RAW infrared images, you’ll get a dull pinkish-red image, like this:
Infrared RAW image straight out of the camera.
Not such a great look, right? Fortunately, processing an IR file is pretty easy. Here’s what I recommend:
Step 1: Start with Auto Tone
This is a common way to handle infrared images. Simply import your file into Photoshop and apply Auto Tone (hit Image>Auto Tone).
Photoshop will analyze your image, then it will make a series of adjustments for the best results (at least, the “best results” according to Photoshop!). Often, this looks pretty good. Here’s what Auto Tone gave me when I processed the file shown above:

At this point, I could continue processing my infrared photo like a normal image – that is, I could proceed with a normal editing workflow – or I could proceed with the next step:
Step 2: Do a channel swap
To get natural blue skies, you’ll need to channel swap your colors. Here, the goal is to take one channel (e.g., red) and convert it completely to another channel (e.g., blue), which is simple to do; create a new Channel Mixer layer (Layer>New Adjustment Layer>Channel Mixer), then adjust the Red, Green, and Blue channels until you get the result you’re after.
But while channel swapping is an essential part of infrared photography processing, photographers disagree over which channels to swap to what values, and there’s no one “right” answer, because it’s all about looks and personal preference.
Here are a few common channel-swap values. Experiment until you find the one that works for you:
Changing the Red and Blue channels only:
- Red channel: Red=0, Green=0, Blue=100
- Blue channel: Red=100, Green=0, Blue=0
Changing all the channels:
- Red channel: Red=0, Green=0, Blue=100
- Blue channel: Red=100, Green=0, Blue=0
- Green channel: Red=0, Green=100, Blue=0
Another creative option:
- Red channel: Red=0, Green=0, Blue=100
- Blue channel: Red=100, Green=100, Blue=-100
- Green channel: Red=0, Green=0, Blue=100
Here’s my image after a bit of channel swapping:
As you can see, the sky looks more natural, and the trees – while still pale pink – feel more grounded.
Step 3: Do any final edits
At this point, we’ve finished all specialized infrared post-processing, but feel free to add final touches like you would to any image.
For instance, you might consider cropping, adjusting the saturation, dodging and burning, adding a vignette, or even converting your photo to black and white. It really all comes down to your personal taste, and as always: experiment, experiment, experiment!

Final Words
As you can see, infrared photography doesn’t have to be that expensive and it’s certainly not as complicated as it might sound.
Infrared photography is a growing photography niche, and it’s a great way to capture creative images, get out of a photographic rut, and just have a lot of fun.
It is recommended you start off simple with filters, then – if you still enjoy IR photos – graduate to a dedicated infrared camera body.
Guide to High-Speed Photography
So you’re feeling the “Need for Speed?” You’ve seen some of those cool high-speed photos of dynamic action totally frozen and want to know what it takes to make them. You want to try a little “photo wizardry,” maybe stop things in mid-air? Well, let’s show you how.


The longer you are a photographer, the more you begin to appreciate the ability of a camera to make magic. One of the special properties of our “magic boxes” is the power to freeze time. I like the way artist/photographer John Berger put it:
“What makes photography a strange invention is that its primary raw materials are light and time.”
When you snap the shutter, you are literally using light to capture a moment of time that did not exist before nor does it exist after you make that exposure. Time moves on, but you’ve frozen a moment and the shorter the exposure, the thinner that sliver of time.
What is high-speed photography?
High-speed photography is capturing the moments that happen in a fraction of time which you can’t see with the naked eye, like a bursting balloon or a splash of water. In other words it is the ability to manipulate the exposure of a photograph so that all movement is frozen and things can be seen that could not be seen with the eye alone.
This photography is different from other kinds because it requires almost 1/20,000th of a second exposure time to freeze these moments. Most DSLR cameras don’t have such a high shutter speed, so how can you take these kinds of shots?
There are two basic ways to do this: One, shorten the shutter speed or Two, use flash in a way that the time the subject is illuminated is extremely minimal. The common denominator between these two methods is that the exposure made on the camera sensor is extremely brief. How brief? Like many things in photography, it depends.
SLIVERS OF TIME IN THE SUNLIGHT
In locations where you are using just the ambient light, say outdoors on a bright day, it’s likely you have already employed the first method. You probably know that to freeze a moving object you should use a higher shutter speed. But how fast? If your intention is to totally freeze the moving subject, you need a shutter speed sufficiently fast enough that there is no discernible movement during the time of the exposure. The necessary shutter speed to freeze the action will depend on how fast your subject is moving. The direction the subject is moving relative to the camera, (toward or away, diagonally, or perpendicular to the camera) will matter as well. How far the subject is from the camera or how much you are zoomed in will matter too.

Aaron Sussman’s The Amateur Photographer’s Handbook (7th ed., 1965, Thomas Y. Crowell, New York) p. 210. *A=toward you, B=diagonal movement, C=right-angle movement, as the arrows show.
This chart gives a rough idea of the shutter speed you might want for common subjects. These are shutter speeds for stopping motion, so longer speeds will allow blurring progressively of all or a faster moving part of the image.


SPORTS, ACTION AND CAMERA SETTINGS
A typical example of when you might want to use higher shutter speeds to freeze the action would be at a sporting event or activity with lots of action. Say you’re shooting a dirt track motorcycle race. You are shooting handheld with a long lens so you have to contend with not just the movement of the subject but possible camera shake as well amplified by the zoom. You take a guess and figure that perhaps 1/500th of a second would be about right. So why not just crank it up to 1/1000th, faster is better right? Great if you have the light to do it.
Here are some things to think about when doing non-flash high-speed photography.
- Keep in mind that adjusting one “leg” of the exposure triangle affects the other two. A shutter speed increase will require corresponding changes of either aperture, ISO, or both.
- A good method when you are new to action photography is to use Shutter Priority mode (S mode on Nikons, Tv on Canons). You can lock in what you think might be the correct shutter speed and the camera will adjust the aperture, (and/or ISO if you are in Auto ISO). You can then try various shutter speeds to determine what is about right, relying on the camera to adjust the exposure for you.
- Continous shutter mode and AI Servo focus (AF-C on a Nikon) will help you catch a good shot. Anticipate the peak action, start a second before that, and blast away through the action.
- Keep an eye on what is happening to the aperture and ISO so you don’t run into problems with depth-of-field or high ISO noise.
- Don’t be afraid of using higher ISO settings however if needed get high shutter speed. Higher ISO numbers aren’t to be feared nearly as much on the newer cameras. If it’s a choice between a noisy image or a blurry one, noise reduction software can often fix the former. There is no fix for a blurry shot.

Many sports shooters prefer shooting in Aperture Priority mode, (A on Nikon, Av on Canon). You retain depth of field control and can “lock” the aperture wide open to let in the most light possible and hopefully keep the shutter speed high. Just watch be sure you have sufficient depth of field and that your shutter speed doesn’t drop below what you have determined is needed to freeze the action. If you are comfortable with Manual Mode, that too will work and you will retain full control, but will also need to monitor all your settings. This works fine where the light is reasonably consistent, but if you’re panning with the action and lighting or backgrounds change this is a challenge. With many newer cameras having Auto ISO you might want to see how that can be used in combination with one of the other modes.
MAKING A SPLASH
A popular use for high-speed photography is making images where the “subject” (water, powder, etc.) spills, scatters, fragments, drips, drops or otherwise flies around. Dramatic shots of materials frozen which we cannot see with our eyes are possible. Making these shots is often messy as well! With bright outdoor light, these kinds of images can often be made outdoors however where cleanup is easier and a fast shutter can freeze the action. Most modern cameras will shoot up to 1/4000th of a second, many will go up to 1/8000th. This is plenty fast enough to freeze things like tiny drops of water in mid-air.

Above are some examples of shots that were made with only the sun as illumination. Reflectors were used in some of the shots to bounce the light. The exposure details are noted. Click here for a complete write-up on the way this image was done.
THE FLASH – PHOTOS AT THE SPEED OF LIGHT
So you need something faster yet? You don’t have enough ambient light to get to the top shutter speeds or perhaps if you do, the shutter speed still isn’t fast enough to freeze the action. Maybe your subject is more easily shot in the studio. Enter the flash where the brief burst of light gets really fast and exposure times are sliver thin.
The key to making high-speed photos with a flash is that the output power of the flash can be adjusted and the lower the power, the shorter the duration of the flash.


AN EXPOSURE WITHIN AN EXPOSURE
So what about shutter speed? When using a flash to make a high-speed photo the shutter speed isn’t what is doing the work. It’s that lightning-fast blast of light that freezes the motion and captures an extremely thin sliver of time. In essence, when you make a flash photo you are making an exposure within an exposure. The total time the shutter is open is when ambient light is being captured, but within that same time the flash fires and exposes the subject for that tiny fraction of a second. Unless you change it, (and we will discuss why you might do that in a bit), the shutter opens and the flash immediately fires. This is called First Curtain Sync (and is typically the default on most cameras.) Then the exposure continues through its duration capturing ambient light until it’s done. When using the flash in TTL (Through the Lens) mode, a pre-flash is fired and the flash calculates how much power to use. This diagram using a sample 125th of a second shutter speed might help you understand the concept.


TAKING CONTROL
Let’s analyze the photo below to understand how this works. The bowl of milk with a spoon in it was placed in the frame. The camera was a Canon 6D equipped with my sharpest lens, the “nifty fifty”, a Canon 50mm f/1.8 prime. Two Sunpak flashes equipped with Yongnuo wireless triggers were placed on either side of the bowl. The room was dark with minimal ambient light and I made several exposures in manual mode, determining that 160th of a second would work with the ISO at 100 for minimal noise and f/25 for greatest depth of field. That exposure with no flash resulted in an almost black frame. You will not want the ambient light affecting the shot. you will need to test the shot with the flashes firing at 1/16th power. This was easily set with the sliding switches on the back of the flash units. (More modern flashes typically set power output in Manual flash mode via a button and LCD readout.) Trying more or less power using the switches was how the exposure was regulated. At that 1/16th power the flash duration was 1/15,000th of a second! You are now ready for the subject to take the plunge.
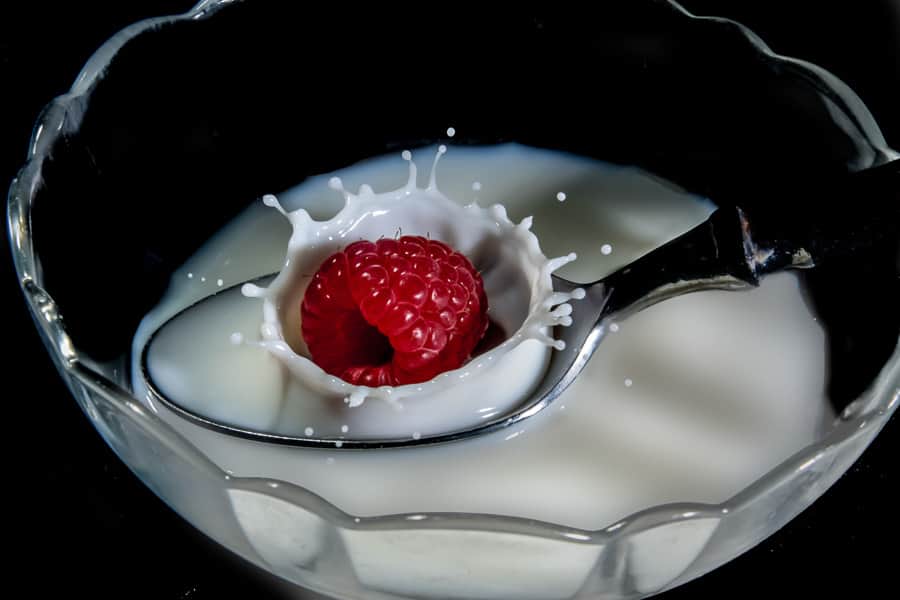
MAKING THE SHOT
Here’s where it became more a matter of reaction time and a good measure of luck. You will now drop the raspberry and a fraction of a second later push the button on the remote shutter. Timing was everything and it took more than a few tries to get a perfectly timed shot. This had also been true when making the outdoor shots of the pepper and fruit splashes. Count on repetitive tries before you will get that “just right” image.
So the steps for making these kinds of shots are:
Set up your shot and place your flash(es) where you think they will best light the subject.
Wireless flash triggers may give you more flexibility in flash location placement.
Put your flashes in manual mode so you can control the power output.
Put your camera in manual mode so you can control ISO, aperture, and shutter speed.
Set your focus to manual and focus on the spot where your subject will be.
A location with low ambient light will help, allowing you to make the exposure primarily with the flash.
Consider using a small f/stop for maximum depth of field.
Consider using your lowest ISO to limit noise.
Shutter speed is not critical here. It is the flash that makes the exposure. Shutter speed will control the ambient portion of the exposure.
Take a test shot without the flash(es) firing. The image should be mostly if not totally black. Increase your shutter speed and/or lower your aperture or ISO until it is.
Turn on your flashes and take some test shots. Adjust your flash output(s) to the lowest power setting that will adequately expose the shot. Remember less power = shorter flash duration. The less power, the more “freezing capability” you will have.
Set your camera to shoot in continuous mode. Having multiple shots fire will increase your chances that one will catch the action just right.
Ready, set, action and shoot!
Expect you may need multiple tries to get the “moment” you want. “Chimp” your shots and repeat the process as needed.

COMBINING SLOW AND FAST
Sometimes you might want a shot which combines motion blur with a sharp frozen image at the end of that blur. To achieve this, you will want to set your camera to use Second Curtain Sync. This means the shutter will open, allowing ambient light to come in and finally, just before the end of that exposure, the flash will fire freezing the subject at the end of the motion blur. If you do not change from first curtain sync, the flash will fire at the start of the exposure and the motion blur will be in front of, rather than behind the moving object. This looks unnatural so second curtain sync should be your choice.
FURTHER AND FASTER
When you’re ready to start shooting even faster-moving objects or find that the “fast hands and timing luck method” isn’t sufficient to capture your moving object you may want to look into a shutter trigger. Some of these use sound to trigger the shutter and flash, others may use laser beams so that when the beam is broken by the moving object, the shutter and flash are triggered. The MIOPS Smart Trigger has multiple modes for sound, laser, lightning triggering as well as Time Lapse and HDR modes. If you’re into DIY stuff and handy with electronics, you may also want to check out the Youtube posts which show how to build your own Arduino-based trigger.
For the capture of really fast objects, (think freezing a bullet in motion), a Speedlight which uses a xenon gas flash tube may not be sufficient. What is called an air-gap flash can give a duration as short as 1,000,000th of a second rather than the 1/35,000th second. Rather than xenon gas, it uses air and instead of 100s of volts it uses a lethal 30K volts. If you get into this realm, you certainly have advanced well beyond the beginner stage and are well beyond this chapter.

What camera and lens do you need?
Let’s talk about the gear you need for high-speed photography first. Of course, you need a DSLR camera and the good news is that any DSLR will work. If you have any other camera that has manual controls, it will also work fine. Next is the lens and just like the camera, any will work. I use a 100mm macro lens for close-up shots like liquid sculptures and a 24-70mm zoom for balloon shots.
The only lens requirement is that the focal length should be long enough so that you have sufficient distance between your camera and the subject, to keep your gear safe from colors and water splashes. I found that 100mm macro is the best lens as it has 1:1 magnification so you can fill the frame with your subject. Because of the 100mm focal length, your camera will also be far enough from the subject.

Other equipment needed
Next, you need flashes and you need a lot of them. In some shots, I’ve even used four flashes together. The next requirement is a tripod because you need to do lots of work simultaneously, so it’s better that camera is fixed on the tripod. You also need a shutter release cable or remote to release the shutter.
The most important requirement for this kind of photography is practice and lots of patience. Sometimes you’ll take hundreds of shots and none of them will be good, and you may think that it’s not your cup of tea. But don’t give up, as with practice and patience you can get desired results easily.


Get a helper as well
You may also need an assistant as you have to do lots of tasks all at the same time, and you can’t do everything on your own. Also, there will be a lot of mess after your shoot and it’s very boring to clean it up all alone. Last but not least, you need to find some creative hacks. For example, for the “Dancing Colors” shot the setup was made using a soap dish, a plastic pipe, a black swim cap, some Velcro and fixed this in the air vent of the subwoofer of my computer speakers.

It’s much easier to fire flashes instead of releasing the shutter to capture an accurate moment. Some wire and a push button switch was used to make a switch to fire the flash manually.
Camera settings
Before we talk about camera settings camera shutter speed doesn’t matter in high-speed photography. In fact, in this image the shutter speed was 1/10th of a second.

In such photography, we usually shoot in a dark room with a narrow aperture and using bulb mode. We open the shutter and fire the flash at the right time to expose the image. So, regardless of whether the camera shutter speed is 1/10th or 1/250th, the exposure time is only when the flashes fire (for the duration of the flash).

Color injected into water.
Hence, these are the camera settings required:
Camera mode: Bulb
Aperture: f/11 – f/16
ISO: 100 – 400
Focus: Manual
Flashes with the lowest power setting possible.
Why do you need to use your flashes on the lowest power setting? Because that will give you the shortest flash duration. If you fire a flash on full power the flash duration is around 1/1,000th of a second. But at 1/128th power, it comes down to almost 1/35,000th of a second, which will freeze the subject completely.

Color injected into water.
Work flow
Set your camera on a tripod with a shutter release cable. Set the lowest possible ISO, go for 100 and increase it only if you don’t have enough flash power. Then, set the aperture between f/11-f/16, focus manually, and leave the camera. Now you need to train someone to press the shutter release button on your mark and release it as soon as the flash has been fired.
Your job is to do the action using one hand (like bursting the balloon, playing the beats or releasing the water drop) and fire the flashes using a switch at the perfect moment. You’ll need some practice but eventually, you will do it accurately.

Points to remember
Shoot in dark room: You should always shoot in a dark room as you are using bulb mode and sometimes your shutter speed will come down to 1/10th or 1/5th. So, if the light in the room is bright, it’ll affect the shot. The room should only have a small (low) light source so that you can see everything.
Small Aperture: Always shoot between f/11 – f/16 so you can get deep depth of field and everything comes into focus. Also, with a narrow aperture, the ambient light won’t affect the shot as much.

Manually Focus: Manual focus is a must as a camera can’t focus in the dark and you may miss the action if the camera keeps attempting to focus.
Flashes: Use the lowest power and slave mode on your flashes so you don’t need to attach all the flashes using wires. With slave mode, you need to fire only one master flash and the others will fire automatically.
The secret trick

The secret is to use burst mode on your camera. Set your camera to high-speed burst mode. You also need to change the camera mode to manual and the shutter speed to 1/125. Plus, you need to attach your master flash to the camera so that it’ll fire with the camera simultaneously.
Now when you press shutter release button, the camera will start taking photos and keep clicking until you release the button. Depending on your camera model, it will click between four to 10 shots per second.

With one hand, press the shutter release button and with your other hand do the action. Once the action is finished, release the button. By using this trick, you can get your first perfect shot in just 5-6 trials.
Conclusion
High-speed photography is a lot of fun. It can be tricky to get right. But don’t give up, keep trying until you get the desired results and share your photos in the comments below.

Black and white photography
If you’ve never tried black and white photography before, you may feel a bit intimidated. After all, how do you get started? Should you be shooting black and white on your camera, or should you be converting color images to black and white? And how can you create stunning black and white images, anyway?
Black and white photography is a strong today as ever it was, thanks to its expressive power and compositional strength.


Black and white photography has unique qualities that are as strong today as they always were. Timeless, gritty, truthful and classic are all common ways of describing black-and-white photography. Despite the advent of mass-produced colour film, which made everyone think black-and-white would fall out of fashion, even after nearly 200 years since Joseph Nicéphore Niépce made the first black-and-white photograph, mono remains as popular as ever.
In the old film days, you were stuck with color film or B/W film which ever you happen to load in your camera. So if you wanted to shoot in the other one, you needed two cameras or just you just had to run through the film until the roll was finished. You were also stuck with what color film you shot in. While it is true that in the darkroom, you could convert color negatives into B/W prints, it was however, a bit of a hassle. So it was better to shoot in B/W from the start. I was lucky that I owned medium format cameras, that used film backs, so I could easily switch multiple types of film in one particular shoot. This was as close to the flexibility of digital photography as you could get in the age of film. Now that most people shoot digitally, I will retract my original statement, shoot only in color and convert those special images to B/W. If you shoot in B/W and you decide you want a paricular image to be in color, it is really hard to convert it to color. While converting to B/W from color is a piece of cake if you have photoshop or Lightroom. Why limit yourself? Besides even if you shoot in B/W from the start you will most likely edit the photo anyways.
So enjoy yourself because like I said the great advantage of digital photography is that you can capture color and black-and-white images on a whim – switching between color and black and white is as easy as diving into a menu. It’s definitely much easier than having to change a roll of film.
Why is black and white photography important?
In the photographic world, black and white is an art form of its own. Some would even say the best photographers work in monochrome. It’s a medium with a rich history; look at the work of Ansel Adams, Edward Weston, or Henri Cartier-Bresson for some truly stunning examples. Even today, decades later the work of these masters is still timeless.
Just as importantly, working in black and white can help you become a better photographer.
How?
It’s all about seeing.
Color is very powerful. It tends to dominate photos – to the point that beginners struggle to see other key elements like contrast, texture, shape, form, and quality of light.
Experienced photographers instinctively see these things, regardless of whether they work in color or black and white. But if you’re just starting out, you may need some assistance. Black and white strips away color, allowing you to focus on the other elements that matter.


2. Form
This describes the three-dimensional appearance of a subject, and how its various parts are arranged. How the subject is lit, and where light and shade intersect, provide depth cues. Here, the petals of the rose lead the eye into the centre of the image.
Things to look out for:
• Sense of depth
• Tonal variation


3. Pattern
The distribution and repetition of shapes into patterns – whether in natural or built environments – help us make sense of everyday life. In this example of man-made patterns, taken in a Manchester street, two contrasting buildings butt up together in an interesting juxtaposition.
It’s a striking enough image in color – but strip away the red brick and the pleasing sand- coloured ornamentation around the windows of the Victorian building, to bring it tonally closer to the Brutalist 1960s office block, and the clash of architectural styles looks even more pronounced than it did in colour.
Things to look out for:
• Uniformity of shapes
• Sequencing of shapes
• Different types of shape
• Tonal variation


4. Texture
Whether smooth or uneven, this quality describes the tactile sense of an object and invites us to reach out and touch it. In color, this ancient Roman column features all the ageing and weathering one would expect to see, but the black-and-white version feels better suited to the subject.
Things to look out for:
• Smoothness or roughness of the surface
• Variation of texture
• Tonal distribution
Tonal Range in Black and White


An average scene in average lighting conditions (above) will contain a range of different tones, from shadows and midtones to bright highlights. A scene like this will have a brightness value of 18% grey – which is also the value that your camera’s light meter is calibrated to, so that consistent exposures can be achieved.
Due to lighting conditions, though, some scenes will feature different tonal variations, so tone becomes something that can be considered for creative effect in the final image.
Think about tonal value while you’re considering shape, form, pattern and texture, and combine them all to determine your creative vision for a black-and-white image. Below we outline the common tonal variations found in black-and-white photography; use these looks for inspiration.


High contrast
With no midtones between the brightest highlight and the deepest shadow, this image has a look that’s ideal for presenting extremes.


Low contrast
Midtones dominate this misty landscape scene. The lack of extremes of contrast make this a low- contrast picture, and lends a sense of tranquillity.


High key
An image made up mainly of light bright tones and white is known as ‘high-key’. It’s a popular technique in studio photography.


Low key
Conversely, an image composed of predominantly heavy dark tones and black is known as ‘low-key’. In portraits, it creates a sense of mystery.
How to shoot in black and white
Before digital photography, the only way to work in black and white was to use black and white film.
But these days, you have two options:
- You can shoot in color and convert your photos to black and white in Lightroom, Photoshop, or some other post-processing program.
- You can switch your camera to its Monochrome mode.
By shooting in black and white from the beginning, you’ll get black and white previews on your camera’s LCD. You’ll also be able to see in black and white via your camera’s Live View mode. And if you use a mirrorless camera, you can look through a black and white viewfinder – so you know exactly how the different colors will convert before you press the shutter button.
(If you’re not sure how to switch your camera to black and white, check your camera’s manual. Don’t worry; it’s not difficult!)
One last piece of advice here:
Shoot in RAW, not JPEG (or shoot in RAW+JPEG, which will give you a file in each format every time you press the shutter button).
RAW essentially offers you insurance. If you decide you don’t like your shot in black and white, your RAW files can be reverted back to color with the click of a mouse. And if you decide to extensively edit your photos in post-processing, RAW gives you a lot of flexibility.
However, if you’re new to photography, I recognize that you may want to work exclusively in JPEG, and that’s okay. Just know that you’ll probably want to switch to RAW eventually (it’ll deliver better image quality in the long run).
Camera Setup for Black and White


While it’s perfectly possible to shoot just in black and white on a digital camera, we recommend taking a different path: capture in color and convert later. This will give you greater flexibility: if the final black-and-white image doesn’t work out quite how you saw it, you’ve still got a color version. You can’t put the color information back into a black-and-white image, but you’ll always get black and white from color. Shoot in raw for maximum detail (below).


1 ISO
Choose a value to give you as much image quality as possible; this will be handy during image processing or conversion.
2 Exposure mode
Choose this according to the shooting situation – but if you’ve got time to think about what you’re doing, use Manual.
3 White Balance
For the widest range, select a WB preset rather than Auto WB. If one colour dominates the scene, try another preset. (If you are shooting raw you can choose the white balance during processing.)
4 Live View
Confirm that a scene will work in black and white by selecting the camera’s black and white picture mode, then view the image on the rear screen. If you shoot JPEG+RAW, you will have a mono preview to help you compose and judge the image and a raw file that contains all the color data for processing the picture in different ways.
Black and White Filters


You can change the appearance of your black and white images in-camera by using filters you may already own, or traditional black and white ‘contrast’ filters. The circular screw-in type is arguably the easiest to use, as it’s less of an encumbrance than a filter adapter, although the latter format makes changing individual filters on the fly a bit easier.


Also used in color photography, a polarizer will make blue skies more vivid, subdue reflections in glass and polished surfaces and heighten the dramatic impact of many landscape shots.
Red filter
One of a number of black and white ‘contrast’ filter which change the way different colors translate into shades of grey. Attach one of these to make blue skies appear darker, and to make foliage look crisper and brighter.
Green filter
Another black and white ‘contrast’ filter, and this time Grass, foliage and vegetation will be depicted more brightly. Skin tones and lips in portraits will appear muted.
In-Camera Picture Styles
If you want to use the in-camera black and white mode (whether it’s just for a Live View preview, for example, or for the final image), head for your camera’s picture styles (‘Picture Controls’ on a Nikon camera). Select the Monochrome option and all images will be captured in black and white.


1. Go to picture styles
Access the Picture Styles menu, or use the Creative Mode button (if fitted to your camera) as a shortcut. (Examples are based around a Canon DSLR.)


2. Select Mono
Scroll through and select Monochrome. You may get a warning in the viewfinder that you’re shooting in mono, but the live view will make this obvious as you compose the picture.


3. Preview the shot
If you are shooting with a DSLR, the viewfinder will not show the image in black and white, but the Live View mode and playback modes will. Mirrorless cameras have electronic viewfinders which will preview the black and white effect.
Digital Black and White Filters
In addition to controls for sharpness and contrast, Monochrome picture styles may give you the option of adding filter effects in- camera (or later, in editing software). Many cameras also offer a toning effect. Here’s how this works on a Canon DSLR:


1. Filter selection
Call up the Monochrome Picture Styles menu and select Yellow, Orange, Red or Green in ‘Filter Effect’.


2. Choose your filter
You can also adjust the Sharpness and Contrast. To boost the filter’s effect, dial in some extra Contrast.


3. Try the toning effect
Why not try creating a mono image in a particular tone? The Canon EOS 5D III(opens in new tab) offers Sepia, Blue, Purple or Green.
Quick tip: Don’t forget about contrast!
If you take a photo in dull light – in shade, for instance, or under a cloudy sky – the photo may look flat (i.e., two-dimensional), especially in black and white.
So what do you do?
You compensate by increasing the contrast. A contrast boost will deepen the shadows, brighten the highlights, and make your main subject pop!
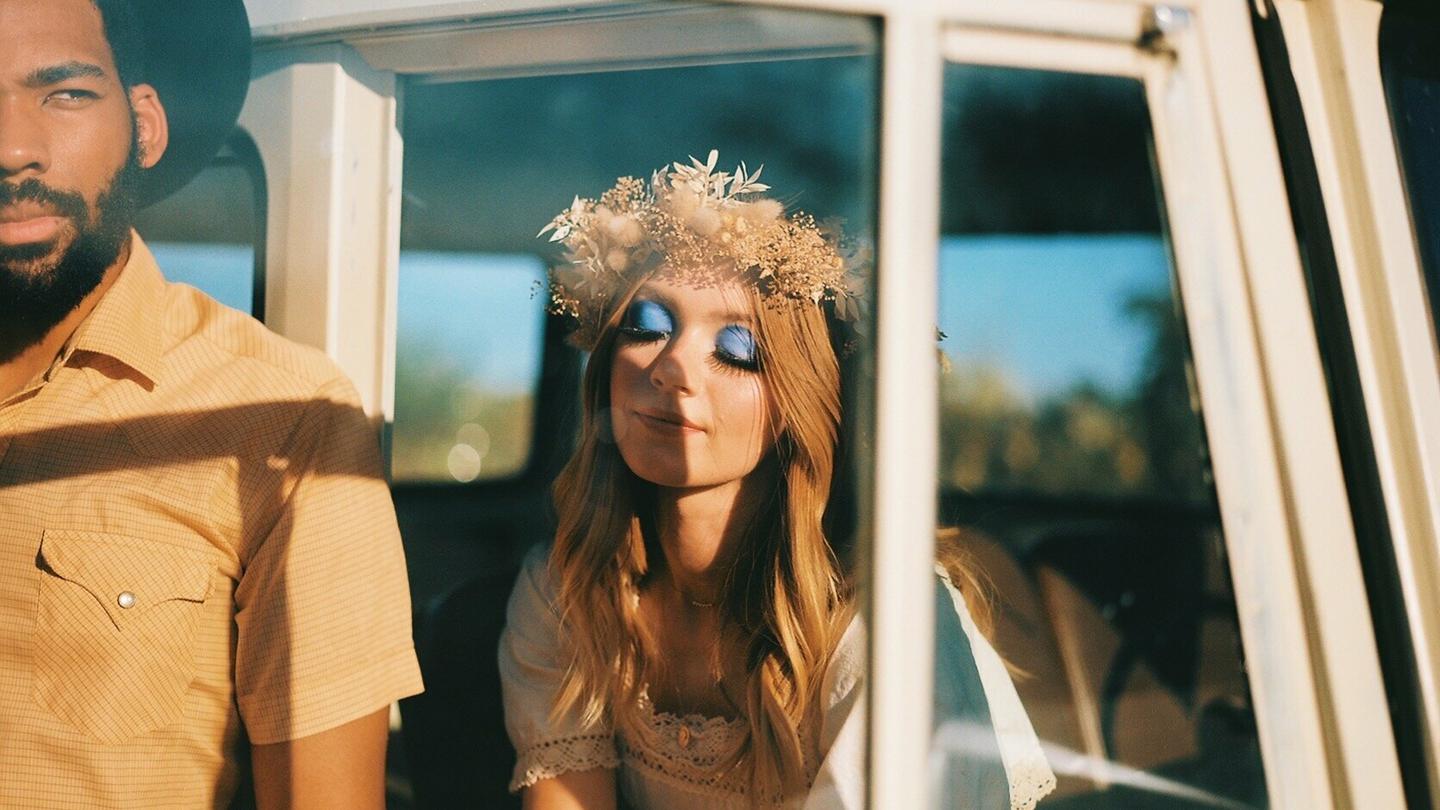
Here’s a portrait without a contrast adjustment:

And here’s the same portrait, but with a contrast boost:

The final (adjusted) result is much more powerful.
You can increase the contrast after the photo has been taken (in Photoshop or Lightroom), or you can do it in-camera by adjusting the contrast setting (see your manual if you’re not sure how to do this!).
Composing in black and white
Remember, black and white forces you to think about other key elements, such as shape and form?
It’s true. And it’s the reason why composition becomes so important when shooting in black and white.
Unfortunately, there’s not really a quick solution to capturing good compositions; a lot of it just depends on your ability to see shapes, lines, and textures (which you can develop through practice or study or simply by looking at great photography).
However, there is one item that can improve your black and white compositions:
The aspect ratio.
You see, certain aspect ratios (such as the 1:1, or square format) make composition easier. Whereas other aspect ratios (such as most cameras’ native 3:2 ratio) make composition tricky.
So after you’ve set your camera to Monochrome mode, I recommend heading into the settings and changing the aspect ratio to Square. It’ll improve the way you frame scenes (and if your camera has an electronic viewfinder, it’ll let you see the new aspect ratio in real-time!).


Toning in black and white
Toning is the process of adding color to your images, but only after they’ve been converted to black and white.
This can give very cool effects – for instance, it can turn your shots yellow or purple or red.
Now, your camera may allow you to tone your photos when you take them. But the effect is usually very heavy-handed, which is why it is recommended you avoid in-camera toning. In previous chapters I said it was important that you get the shot right from the beginning instead I’d relying on post editing to get it right. This still holds true with B/W. Even though you can do some basic editing with your camera, it is better to do it on your computer. The software is much more advanced. Besides you have enough to think about with composition and exposure when you are trying to get that perfect shot.
Instead, test out toning in post-processing. You can have lots of fun applying a single tone to your images (such as a nice sepia). And if you want to get really creative, you can add multiple tones, an effect called split toning.
Black and white photography: final words
Black and white is a beautiful medium to work in, one that you will appreciate even more as your skills grow.
In the meantime, have fun and enjoy yourself. You are following a path trodden by some of the most famous names in photography!
Resources
Expert photography.com, ” The Ultimate Guide to Film Photography. “; shopmoment.com, “A Beginner’s Guide to Film Photography. “; shotkit.com, “Guide to Infrared Photography. “; photography-school.com, “Infrared photography:How to Get Started. ” BY Nisha Ramroop; photography-school.com, ” How to do High-Speed Photography: The Fundamentals. ” BY Ramakant Sharda; improvephotography.com, ” A Beginner’s Guide to High Speed Photography.” BY Rick Ohnsman; digitalcameraworld.com, “Black and White Photography: How to see and shoot memorable monochrome.” BY Digital Camera; digital-photography-school.com, “Black and White Photography: A Beginner’s Guide to Getting Started.” By Andrew S. Gibson; thedarkroom.com, ” Pushing and Pulling Film: Everything you need to know about Shooting and Developing Pushed or Pulled Film.” By Tracy Mikulec;