


Many photographers today want to know how to take macro pictures, thanks to a growing number of beautiful images online of small plants, animals, and insects. Macro photography is not always easy, especially for beginners, but it is one of the most rewarding genres of photography you can do. With the right skills, you will be able to capture amazing images even in your own backyard. To learn macro photography from start to finish, you should begin by reading the tips and techniques in this guide, taught by an award-winning macro photographer exhibited at the Smithsonian Museum of Natural History. By the end, you will know exactly how to put these recommendations into practice and capture stunning macro photographs for yourself.

NIKON D800E + 105mm f/2.8 @ 105mm, ISO 100, 1/640, f/3.2
What Is Macro Photography?
Macro photography is close-up photography of small subjects, including things like bugs and flowers. You can take macro pictures in a studio or outdoor environment so long as you are magnifying your subject sufficiently.
Officially, you may hear that macro photography only happens when you take pictures of small subjects with a magnification of “life size” or greater. I will cover more about the meaning of magnification and life-size in a moment, but essentially it means that you must take pictures where your subject is the same size as your camera sensor or smaller, and it fills the frame. (So, if your camera sensor is one inch wide, you would be photographing something 1 inch or smaller.)
That is a very strict definition, and frequently you will hear photographers call an image “macro” even when it shows a slightly larger subject. The same is true of the photos in this article, many of which do not fit this technical definition, but they are close-up photographs nevertheless.

Introducing Macro Photography for Beginners
How do you take macro photos? Here are the most important steps:
Understand macro photography terminology.
Pick the right camera and lens equipment.
Get enough depth of field.
Pick camera and flash settings for a well-lit photo.
Focus on the most important part of your subject.
Learn the common behaviors of various insects.
Compose and take your picture.
Some of these are harder to do than you might think, such as getting enough depth of field and focusing on the most important part of your subject. However, the tips in the rest of this macro photography tutorial will give you a good idea of where to begin, and you should be able to master everything with a bit of practice.

What Is Magnification?
In macro photography, it is important to know how large or small your subject appears on your camera sensor. Comparing this number versus your subject’s size in the real world gives you a value known as your magnification.
If that ratio is simply one-to-one, your subject is said to be at “life size” magnification. For example, if you’re photographing something that is one centimeter in length, and it is projected exactly one centimeter onto your camera sensor, it is at life size (regardless of the size of your camera sensor).
Typical sensors in DSLRs and mirrorless cameras range from about about 17 millimeters to 36 millimeters across. So, a 1 cm subject is pretty big by comparison, taking up a significant portion of your photo. If you end up making a large print, that tiny object will appear huge – potentially billboard sized!
To make things easier to understand and compare, macro photographers use an actual ratio rather than always saying “life size” or “half life size.” Specifically, life size is 1:1 magnification. Half life size is 1:2 magnification. Once you get to about one-tenth of life size, you arguably are not doing close-up or macro photography any more.
Good macro lenses let you shoot at 1:1 magnification, and some specialized options do even more than that. (Canon has a macro photography lens that goes all the way to 5:1, or 5x magnification, which is insane!) However, other lenses on the market called “macro” may only go to 1:2 magnification or even less. Personally, my recommendation is to get a lens that can go to at least 1:2 magnification, and ideally 1:1 magnification, if you want as much flexibility as possible.

What Is Working Distance?
Working distance is easy: It’s the distance between the front of your lens and your nearest subject. If your working distance is too small, you might end up scaring your subject or blocking the light simply because you are too close. Ideally, you will want a working distance of six inches (15 centimeters), with the best case scenario being twice that or more.
The working distance of a lens is smallest at 1:1 magnification, since you obviously must be as close as possible to your subject to capture such extreme photos. Also, lenses with a longer focal length have more working distance than lenses with a more moderate focal length. For example, the Nikon 200mm f/4 and the Canon 180mm f/3.5 are two examples of macro photography lenses with large working distances. By comparison, the Nikon 60mm f/2.8 macro lens has much less working distance.
It is always best to look for a lens with the largest possible working distance so that you are less likely to scare your subject or cast a shadow on it. However, macro lenses with a longer focal length like 180mm or 200mm are generally more expensive. If you want to balance price and working distance, consider a lens in the range of 100mm to 150mm. Personally, I use a 105mm macro lens.

Best Cameras for Macro Photography: DSLR vs Mirrorless
For macro photography, both DSLRs and mirrorless cameras can work very well. The key is to pick a camera that lets you use a good macro lens, and ideally one which has as little lag as possible between seeing your subject, pressing the shutter button, and having the image recorded. Traditionally, these both were areas where DSLRs held an advantage, due to lagging electronic viewfinders and fewer native macro lenses on mirrorless cameras. Today, those differences are generally negligible, and sometimes lean in favor of mirrorless.
Mirrorless cameras also frequently have other benefits that you might find useful, such as focus peaking (an overlay that shows which parts of your subject are in focus – helpful for manual focus macro photography). Also, the ability to review your photos without taking your eye from the viewfinder is valuable if you want to judge things like sharpness and flash exposure quickly.
The only thing I would caution is that, if you do pick a mirrorless camera, you should get one with an electronic viewfinder. Trying to compose and hold a macro photo steady with a rear LCD screen, especially at extreme magnifications like 1:1, is a nightmare. Since mirrorless cameras with electronic viewfinders frequently cost more than a competing DSLR, you might want to pick up a DSLR (potentially a used one) if you are on a budget. But all of this is very picky. Regardless of the camera, you will be able to get some excellent photos – and you will never find a camera that guarantees a perfect keeper rate for such difficult subjects!

Best Cameras for Macro: Full-Frame vs Crop-Sensor
If your goal is to create photos with the highest magnification possible, full-frame cameras are usually overkill for macro photography. Even the Nikon D850 with 46 megapixels cannot match the potential macro detail of the 20 megapixel Nikon D7500, simply because the D7500 has a slightly higher pixel density.
With macro photography, the highest pixel density (most pixels per square millimeter of the sensor) is what determines the maximum detail you can get on your subject. The D850’s large sensor has fewer pixels per millimeter than the crop-sensor D7500, despite having more total pixels. In many genres of photography, larger pixels – and more total pixels – are preferable. With 1:1 macro photography, though, it’s all about pixel density. The reason? When you crop a D850 photo to match images from the D7500, you lose enough pixels that the D7500 wins (though not by much).
Still, full frame cameras are great for macro photography. You shouldn’t think otherwise. If you take photos that aren’t at maximum magnification, they still have all their usual benefits over smaller sensors. So, a full-frame (FX) camera is still generally better for macro photos than a crop-sensor (DX or aps-c) camera, but by a smaller amount than in other types of photography.

Best DSLR for Macro: Canon vs Nikon
For almost all genres of photography, Canon and Nikon (and Sony, and others) are so close in quality that arguments about which is “better” are, at best, extremely picky. Sure, there are differences, but it is rare that any system has a flaw that is fatal for the typical user.
As far as macro photography, this is still true, but you do need to keep some extra considerations in mind. Canon cameras in particular do not calculate aperture in the same way that cameras from other brands do. Specifically, when you shoot at high magnifications like 1:1, the Canon cameras will read your aperture value incorrectly. It might say f/11, when everything about the photo (diffraction, depth of field, and exposure included) acts as if you’re shooting at f/22.
That is because aperture, on any lens, starts to do unexpected things at such high magnifications. In short, when your aperture is physically one size, it acts like another. Nikon, Sony, and other manufacturers all tell you the “functionally correct” aperture (f/22 in this case), while Canon does not. So, you need to keep that in mind when you shoot Canon cameras. This is far from an impossible drawback to overcome, but it is important to know about. The more frequently you change magnifications, the more of a problem this is.

How to take macro photos
Nowadays, both point-and-shoot cameras, mirrorless cameras, and DSLRs have a built-in macro mode that helps users capture significantly closer shots of an object from an observable distance. The camera automatically adjusts lens elements and moves them closer to the sensor to best suit close focusing. It does so without the need for extra lenses or macro tubes. Of course this cannot be considered true macro, because to achieve that you will need a dedicated macro lens. Alternatively, you can get an accessory that will enable your camera or lens to shoot macro.
There’s also an option to “fake” a macro by cropping your photo to make your subject appear more magnified. However, since the digital output from most cameras (except for those with full-frame sensors) are not as large as on film, resorting to such measures will usually result in reduced image quality, which is why cropping does not yield desirable results.
To achieve true macro photography, there is a wide range of macro lenses available for select digital cameras that are optimized for achieving as much as 10x magnification for professional macro images. But even with the right gear, pro macro photography can still be hard to execute without knowing how to properly adjust your camera settings to suit your shooting requirements, or without knowing how to create a more favorable shooting situation before clicking the shutter.
Macro shooting may now seem to be more complicated than you thought it would be, but it really isn’t—especially not after using some of our top tips for capturing the best macro photographs.
Macro Photography Tips
Macro Photography Tip #1: Get a good macro lens

While today’s cameras offer a macro mode in the menu or analog settings, they don’t offer as much as 1:1 magnification. If you want magazine or gallery-quality macro pictures, you’ll need to purchase a dedicated macro lens for your camera. There’s a wide array of macro lenses on the market that offers 1:1 magnification and above for your camera. You might be taken aback by some of their price tags, but they’re definitely worth the investment for greater quality macro shots.
Enthusiasts have a few great options, including extension tubes and reversing lenses. A standard camera lens with extension tubes on it offers some magnification, while a reversed lens and extension tubes deliver greater magnification.
But if you’re new to macro photography, a dedicated lens for your camera is the most convenient and versatile option that you have. A lot of popular macro lenses have focal lengths between 90 to 105mm and 1:1 magnification. Other lenses feature shorter focal lengths with shorter working distances. So they might need you to come closer to your subject as you shoot.
Bonus tip: If you plan on shooting flat objects such as coins, stamps, use a “flat-field” macro lens to ensure edge-to-edge sharpness.
Macro Photography Tip #2: Choose a suitable subject

Contrary to popular belief, not everything will make for a good macro subject. There are certain subjects that are indiscernible when viewed close up and without context—and if your viewer can’t understand what they’re looking at when they see your macro shot, how can they appreciate it? But of course, this is all a question of preference and aesthetics. If the subject you photographed appears confusing in macro but is still aesthetically pleasing to the eyes, then it definitely qualifies as a suitable subject.
Common subjects include small insects, butterflies, rain drops, and small objects such as miniature dolls, jewelry, and household items. Inanimate objects are fairly easy to photograph as they don’t move, but insects and bugs can be a lot more challenging. One key tip for photographing them is to shoot from a safe distance to avoid scaring them off.
Macro Photography Tip #3: Pick the best location and weather

Small bugs and insects are among the most interesting subjects in macro lens photography, as well as flowers and plants. Locations that have plenty of flowers and plants will give you many opportunities for macro shots. As for bugs and insects, these creatures are more active in warm outdoor temperatures. This means you should go out and shoot them at around 62°F (17°C) or warmer.
It’s also great to capture insects in colder weather since they stay still in their habitat. A few macro enthusiasts travel to certain places early in the morning during summer so they can see and capture sleeping insects. You’ll also get softer light with overcast weather, making it a much better climate than sunny conditions to capture macro images.
Also, learn bug behavior. There are bugs that fly away when you come close to them, adapt to your presence within a few minutes, or completely ignore you. Shooting plenty of macro images is great for learning bug behavior: You’ll easily predict your subject’s next move when you do.
When photographing extremely thin objects like flowers or leaves, bright sunlight can be a difficult aspect to combat, as it can “burn” through your subject and cause hot spots, or parts of your image to be overexposed. Try shooting during cloudy days, utilizing shade, or creating shade as needed.
Macro Photography Tip #4: Get stable with a tripod

You can control composition and eliminate the variable of a moving camera very simply: don’t move it. Put it on a tripod, a bean bag, or a mini-pod so it goes nowhere.
Whether you choose to shoot with a tripod, a monopod, or simply are careful to position yourself in an “anchored” position, you should be conscious to steady your camera when shooting extremely close-up. The smallest unintentional shifts in framing can change an entire shot.
Macro Photography Tip #5: Use a longer focal length for living subjects

Speaking of lenses, you may want to go for those that offer longer focal lengths, depending on your subject of choice. This allows you to “digitally” move in closer (without actually having to move closer) when photographing insects and objects close-up without disturbing them or disrupting their natural environment. The best focal length for these types of situations should be anything above 90mm, such as the Tokina atx-i 100mm F/2.8 FF Macro Lens.
Macro Photography Tip #6: Incorporate assistive accessories

Even without a dedicated macro lens, you can achieve good macro shots with assistive accessories that can be incorporated into your macro kit. There’s what they call a diopter, which is also known as the “poor man’s macro lens.” It’s basically close-up filter or magnifying glass that is screwed on to your regular lens or to any bridge or compact camera to achieve macro magnification without having to purchase a true macro lens.
Bellows or tubes are the accordion-like, expandable part of a camera that helps achieve ultra-tight close ups on your subject. You can also get lens adapters that allow you to reverse your lens and manually control the aperture.
Instead of using a tripod, which can be quite restrictive for the photographer, you can use “third hand” devices (anything you can create or devise with the available tools you have to create a literal “third hand”) for holding and supporting your subjects steadily and against your desired background.
Macro Photography Tip #7: Customize your background

Shooting inanimate objects is fairly easy as you can have complete control over the positioning, lighting, and even your background. Simply place it against your desired background, depending on your composition, and make sure they don’t clash with each other. Many photographers prefer to keep it simple by positioning their subject in front of a contrasting background that’s located farther away from the subject, so it comes off as a beautiful background blur.
If you’re spontaneously shooting outdoors, you may not have that much control over your background. However, you can change your perspective or maybe use that “third hand” support for positioning your object, such as a leaf or flower, to face you from another angle.
Remember that the eye naturally goes to the brightest spot in a photo, so if you are shooting in mixed light, be aware of what’s in the background. You may need to change your point of view, get closer and fill the frame with your subject, or bring a sheet of plain paper or an 8×10-inch print of generic, highlight-free foliage to hold behind your subject. You can also control background clutter by shooting at wider apertures, which reduces background focus, or using a ring light, which throws most backgrounds into darkness.
Macro Photography Tip #8: Pay attention to your depth of field

Most people will advise you to use smaller apertures (a larger f-stop number) as this helps increase your depth of field and ensure that the important parts of your subject are in sharp focus. However, the problem with using a smaller aperture is that the reduced and diffracted light can greatly affect the sharpness of your image. On the other hand, if you use too large of an aperture, you end up with less depth of field. This means that some parts of your subject may end up blurred out as well.
One of the hardest parts in doing macro photography is achieving the right balance between desired sharpness and depth of field. If you are able to shoot from a perspective or angle that allows you to fit the most important or interesting parts of your subject on a single plane of focus, which ensures that your subject remains sharp while still maintaining beautiful background bokeh, then it’s all a matter of finding the largest aperture that will allow you to do that without leaving your subject blurred out in certain parts.
Potential fix: Crop your image
Or if you don’t mind cropping your image, you can also decrease your magnification and use a smaller aperture to ensure that all parts of your subject are sharp, then simply crop the photo to make your subject appear more magnified. However, a challenge in using smaller apertures is that it restricts more light from coming into the lens, which means you’ll often need slower shutter speeds to be able to properly expose your shot. Depending on the photographer, the solution can be using a tripod for a steadier shot or using flash to add more light to the scene.
Potential fix: Try focus stacking
Another recommended solution to the problem of balancing depth of field and sharpness is focus stacking, which is a built-in feature in a select number of cameras. If you don’t have this feature, it can also be accomplished in Photoshop.
Macro Photography Tip #9: Go manual

While the automatic features in today’s cameras often take the guesswork out of photography, when it comes to focusing on close-ups, you’d be better off using the manual override. That’s because the autofocus feature works best when there’s a clear area for the lens to lock in on. But that’s usually not the case when we shoot close-ups with our macro lens. In fact, your lens will go bananas trying to find something to lock in on. By working with manual focus, you can decide what you want to focus on and lock into it when you are satisfied with what you see through your lens.
Be especially careful when the element you are focusing on is at the center of your image. Remember that with a narrow depth of field, everything toward the edges of the frame will tend to be out of focus. If you have a bright, blurred area at the lower edge closest to your lens, it could dominate your composition and draw the viewer’s eye away from your actual focal point. If you see a bright area along the lower edge, recompose or focus on something in the bright area and create a composition around that.
Macro Photography Tip #10: Create better lighting

A key component in photography is light, and macro photographers obviously greatly benefit from having good lighting conditions. Aside from using it to artistically improve your shots, you can add light to support your exposure settings. You can do this when the subject is still too dark despite having a wide open aperture.
Many macro photographers would advise beginners to use a ring flash to enable the use of smaller apertures, as well as faster shutter speeds for handheld shooting and moving objects. Ring flashes or twin flashes offer good 3D lighting that is not as flat as built-in pop-up flashes.
Macro photography makes capturing enough light rather challenging. Maybe it’s because you’re using high levels of magnification. Or perhaps it’s because the close focus on your camera magnifies motion blur and blur from camera shake. Alternatively, you’re blocking more natural light when you come closer to your subject. Using flash can help you solve any of these issues. Flash fills in your preferred amount of light and quickly freezes motion.
But camera flashes can also give you harsh lighting and glaring specular reflections when you use them for macro shots. A diffuser will prove useful in these situations. It lets you extend the flash area and produce a much softer light.
Macro Photography Tip #11: Improve your in-camera composition

Whether you’re shooting macro or any other photography style, a photographer should learn how to improve their composition in-camera. This means properly framing your subject before clicking the shutter instead of relying on post-processing to correct your composition. This can be quite crucial for macro photography, as cropping your shots decreases the photo resolution.
Instead of cropping a photo of an insect to make it look larger, increase your subject magnification while shooting so you get to keep your original resolution.
Macro Photography Tip #12: Plan your point of focus

You have your shot ready, and all you’ll need to do is focus on your subject and click the shutter. But before you do, it helps to realize that in macro photography, your point of focus can greatly improve your composition.
One thing that can help you take better macro photos is to learn how to focus on different parts of the frame manually. Try to change your focus to provide different and interesting perspectives.
Macro Photography Tip #13: Change Your Angle

Macro photography newbies usually capture their subject from their current position and stand towards it at 45°. Your photos will look boring if you make the same mistake, so finding unique angles is key. Try capturing your subject from the side, the front, or below. You can also get a more intriguing angle and a more stunning background when you pull up the plant or leaf that your subject is resting on.
Macro Photography Tip #14: Add in elements

Photographing dew drops on a plant or raindrops on a window can make for some striking macro shots. But you don’t always have to wait for rain or dew. You can also use a simple spray bottle and delicately add drops to your subject, to bring out more visual interest in your image.
Macro Photography Tip #15: Be patient

Macro photography can be a very rewarding style of photography, despite it being somewhat complicated for many beginners. While there are a lot of things to remember in order to achieve a good professional macro shot, practice helps make it a habit. Once you get used to it, it becomes a skill and you’d be well on your way to improving your shots with every click of the shutter.
Be bold in your composition, look for stunning color, and don’t be afraid to experiment and create abstractions. The greatest benefit of macro is how it transforms mundane subjects into worlds of wonder by enlarging them far beyond what the human eye is used to seeing. Pump up your digital camera’s color and contrast settings if that suits the subject. With a film cam, use super-saturated film.
Once you’ve eliminated the variables, it’s time to have fun. Keep shooting, and don’t be afraid to experiment. Shoot closer, and closer still. The closer you get, the more will be revealed for your waiting camera. Enjoy exploring and photographing the tiny worlds that await you!

Editing Macro Photography Images
The ability to fix your photos later in Adobe Photoshop shouldn’t mean that you can afford to be careless with the photos you take. It does mean that you can make up for problems you could not solve with your camera and. It also lets you shape and tweak your image until it becomes the aesthetic product you want to create.
Crop your image
Cropping is invaluable, especially for close-ups. You can’t always get as close to your subject as you’d like. Just define the area of the image that interests you most and resize it so it fills the frame. Finally, cropping lets you fine-tune your composition. In close-up work, you often can’t get the best composition during the shoot. You may have no choice but to include some distracting background elements. Afterward, you can play with your framing and refine your composition on your computer. A little creative cropping can erase or minimize unwanted background features and help direct the viewer to the area of the image that is most important or interesting.
Adjust colors
Close-ups, more than other kinds of photographs, pick up and reflect the colors of their surroundings. If you find that your color is not quite right, use the color balance control or the white balance tool in your software to recreate the color you saw. Both work with sliders so you see the color changes and can play with them until you are satisfied.
Alter exposure
It’s often difficult to get the best exposure in close-ups because you are working at close range and can’t always compensate for lighting deficiencies by adding light. Luckily, you can rescue otherwise fine images which need an exposure fix. For example, if your subject is darker or less vibrant than you would like, you can simulate fill light by using your fill slider. Or you can tone down an overly-bright image using the exposure or recovery slider. See Diane Miller’s article Virtual Fill Flash for more on this technique.
Fine-tune contrast
To add contrast, use the contrast slider or black slider for the effect you want. Experiment with your black slider to achieve a contrast level that will set your subject off from the background. The clarity slider can also be used to increase contrast by adding a slight “pop” to your image.
Sharpen your image
Even if you do everything possible to get a sharp, in-focus image when you shoot (see our previous article), you will still generally need to sharpen your images as part of the after-capture process. That’s because digital images are structured with pixels that have been altered during exposure so they appear to blur.

Macro Photography: Frequently Asked Questions
Is Macro Photography Hard?
Macro photography is equally hard as other photographic genres. But it may require more patience, an eye for details, a steadier hand, and more precision. It may also require dedicated gear and more preparation and planning.
Furthermore, this is a type of photography that doesn’t allow mistakes. You need to create clear, sharp images that focus on the right spot. Composition rules are essential when you work with such small subjects.
But if you love macro photography, none of these will seem difficult. If attention to detail is your strength, you will enjoy looking for tiny subjects or arranging the perfect scene. The world is full of little wonders you can’t wait to reveal.
Can I Use a Telephoto Lens for Macro Photography?
Because telephoto lenses offer a near-macro magnification, you can use them for macro photography even though they don’t offer true macro magnification, which requires a 1:1 magnification ratio.
The magnification may be increased by mounting a telephoto lens on a body with a smaller sensor. But compared with dedicated macro lenses, they do have some disadvantages. Telephoto lenses offer smaller apertures, increased camera shake risk, and longer minimum focus distance.
What Is the Difference between Macro and Micro Photography?
The main difference between macro and micro photography is the magnification factor. In macro photography, the magnification ratio is between 1:1 and 10:1. In micro photography, the magnification ratio is between 10:1 and 20:1. While macro photos capture life-size objects, micro photos capture almost microscopic features.
Another difference is the purpose of the photographs. Macro photos aim to reveal the unseen world to a large audience and focus on beauty and storytelling. Micro photos have a more scientific purpose and aim to gather information rather than reveal beauty.
Common Macro Photography Mistakes You Should Avoid
Thanks to a macro lens, or dedicated close-up attachment, nature photographers can capture frame-filling shots of extraordinary miniature things. In close-up, the exquisite design and beauty of flowers, fungi, invertebrates, and other tiny subjects can be revealed. This is a fascinating world to explore, but high magnification photography – of up to 1:1 life-size or greater – presents a number of key challenges. It is a fiddly and technically demanding genre, but one that will provide rich rewards once you’ve mastered the basics.
There are a number of common mistakes in macro photography that newcomers will make – and, let’s be clear here, I’ve also made them all myself over the years! The problems are normally easy to fix once identified, though – all you need is a little help and guidance.
1. Using the wrong kit
You won’t capture great close-ups without the right kit. While some telephotos and zoom lenses boast a close focusing distance and provide a useful level of magnification for larger insects and flowers, if you really want to capture miniature detail you will need kit designed for the job.
A macro lens, dedicated to close focusing, is the obvious choice. All macros provide a reproduction ratio of 1:1 (life-size) – and a few, like the Canon MP-E 65mm and Laowa 100mm Ultra Macro, even go beyond this. However, while they all do the same thing, shorter focal lengths require you to get closer to your subject. This is not a major issue if you only intend to shoot inanimate objects. But, if you want to shoot insects, reptiles and amphibians, then the longer the better.

Too many macro photographers get frustrated by having a macro lens that requires them to get within a few centimetres of their subject. All too often, their subject has flown or scurried away before they’ve taken a decent shot. Instead, I would recommend a macro with a focal length of 100mm upwards. This will provide a larger, more practical working distance from your subject and maximise your chances of success.
Tele-macros also have a narrower field-of-view, so they capture less background clutter. That said, shorter macros are great for environmental shots and are lighter and cheaper, so don’t dismiss them entirely. Close-up filters and extension tubes are cheaper alternatives, but again require you to get close to subjects, which is not always practical or possible. Having the right tools for the job will save a lot of frustration and help ensure you don’t ever miss the shot.

Beginners may not be aware that, when you look through the viewfinder of a SLR camera, you are ‘seeing’ the image at the lens’ fastest maximum aperture – not necessarily the f-stop you’ve selected. Therefore, the images you capture can look very different to what you see through the viewfinder.
Mirrorless cameras have the advantage here, as many provide ‘live’ depth of field. This allows you to preview the zone of sharpness before you take the photo, and adjust settings if required. LiveView also does this, but on some models of camera you may need to depress the depth of field preview button to see how far depth of field extends.


4. Not working quickly enough
One of the costliest mistakes close-up newbies make in macro photography is being too slow. When shooting insects, reptiles and other small creatures, you must be prepared to react and work quickly.
Don’t rush or panic – that will only lead to you making errors. However, it is important to work efficiently and be able to adjust key camera settings – like aperture and ISO – without having to take the camera away from your eye, particularly when stalking timid subjects and working handheld.
Unless you are shooting early or late in the day (when subjects are roosting and inactive), photo opportunities may be fleeting with subjects only resting, feeding or basking for a few brief moments before moving again. Therefore, there is no time to waste.
Observe your subjects closely; you may notice a pattern to their movement. For example, some dragonflies are territorial and will return to the same resting place again and again.

Previsualise the shot you want to take and adjust your camera settings in advance so that you are set-up and ready. By doing so, you will work as fast and efficiently as possible when opportunities present themselves.
While it is tempting to creep up really slowly, insects in particular won’t remain in one spot long and so if your approach is too laboured, your subject will be gone before you’ve got anywhere near it. It is worthwhile taking an “insurance” shot, from slightly further away, before getting closer – that way you at least have something.
Keep movements smooth and deliberate and, most importantly, avoid rapid actions close by. You may only get time for one or two frames, so make each shot count.
5. Insufficient shutter speed
An all too common issue with close-ups is a lack of critical sharpness. While this can be a focusing issue, it can also be due to an insufficient shutter speed being set. Even the tiniest of movement – camera or subject – appears vastly exaggerated at higher magnifications.
Ignore the old adage that you only need to employ a shutter speed equivalent to the focal length you are using – that advice goes out the window when shooting macro. The faster the better, ideally.
The emphasis is on fine detail when photographing miniature things – if the key areas aren’t bitingly sharp, the image will be ruined. Even using a tripod doesn’t entirely guarantee sharp results when shooting close-ups as wind movement, mirror slap (when using a SLR), and vibrations created by physically touching the camera can noticeably soften image quality if the shutter speed isn’t fast enough.

Generating a fast shutter speed is even more vital when working handheld. Using a large aperture is one way to produce a faster shutter, but doing so will limit depth of field. Instead, I would always advise you to first select the aperture you need to achieve the level of depth of field you desire, and then incrementally increase ISO sensitivity until you generate a fast-enough shutter to achieve pin sharp results.
Yes, higher ISOs will produce more digital noise, but the high ISO performance of modern cameras is excellent today and noise reduction software (like Topaz Labs DeNoise AI) can be used if needed. My attitude is that it is better to have a noisier file that is sharp, than a shot which is noise free, but soft. I’m sure you’ll agree.
6. Camera not parallel to subject
So many close-ups are ruined due to not enough of the subject being recorded sharply – it is a common issue in macro photography.
The depth of field can be measured in millimetres when shooting at higher magnifications, so there is absolutely no margin for error with focusing. But in order to maximise the depth of field available to you – at any given f/stop – you need to think carefully about your camera’s position.
You will often want to place as much of your subject within the camera’s plane of focus as possible. To do so, it is vital you position your camera parallel, and therefore equidistant, to the subject.

For example, when shooting a butterfly basking in the sun, carefully angle your camera so that it mimics the angle of the insect’s open wings. This technique doesn’t actually extend depth of field, it simply allows you to make the most of what you have. Many subjects have one relatively flat side, so this approach is useful for a wide range of subjects, helping you to achieve sharper results with less of the subject drifting frustratingly out of focus.
Obviously, there will be plenty of situations where you wish to throw parts of your subject creatively out of focus, in which case mismatch the plane of focus with your subject to place added emphasis on your point of focus.
7. Getting too close
At first glance, this tip might appear a little counterintuitive, but it is a common and understandable misconception that close-up photographers should always fill the frame with their subject. While frame-filling shots undoubtedly can have loads of impact – and highlight detail and colour – they rarely convey a sense of scale, context, or tell a story.
It is a mistake to always fill the image-space.

Including a degree of negative space, or a recognisable slice of the subject’s environment, can prove powerful and convey a proper feeling of size or vulnerability. It is easy enough to capture images with more context – simply attach a shorter focal length or shoot from further away. And you always have the option to crop the image if you later decide that the negative space doesn’t work – whereas if you go too close, there is no alternative but to stick with it.
8. Shooting in harsh, midday light conditions
Shooting when the sun is high overhead will often result in dark, ugly shadows and bright hotspots. A high level of contrast is rarely a desirable thing when shooting miniature detail, and I see many otherwise good close-up images ruined due to the light’s quality.
Ideally, shoot in the morning and evening when the sun is lower in the sky and light is soft and diffused. This is not always possible or practical, though. Thankfully, close-up photographers typically possess a huge amount of control over how their subject is lit.


When shooting small, nearby subjects, it is relatively easy to alter, influence, and enhance lighting. In bright midday light, use a small diffuser – or even cast your shadow over the subject – to produce a more even, diffused light. Or use flash, a reflector, or small LED light to relieve ugly midday contrast.
Using lighting aids is obviously less practical with subjects that may move. However, when photographing flowers, texture, or hatching or mating invertebrates (which are less likely to move), don’t allow harsh sunlight to ruin your close-ups.
Super Macro Photography: Discover the Magic of Close-up Macro Photography

The majority of photographers spend their time shooting things that are normally observable. But it is possible to use your camera differently and immerse yourself in a world that is usually unseen, or at the very least, not seen in great detail. Embark on a journey with us to the limits of normal Macro photography. We’ll show you one of the methods for photographing Super Macro, that is, Macro with larger magnification.
Anyone can do Super Macro photography, however, it does require some less-than-standard equipment. Nevertheless, this equipment is available at many different price points. You can start out very simply and when the observation of minute details draws you in even more, you can splurge for higher-end equipment.
What is Super Macro?
Standard Macro photography is defined by a magnification of 1:1 – objects are projected on to the sensor at their actual size. That is, at least on a full-frame sensor with a width of 36mm.
With increased magnification, we gradually move to the realm of Super Macro. For an 18mm wide object that fills the entire 36mm sensor plane, you’ll get 2:1 magnification. If you are able to shoot a 9mm object, the magnification is 4:1, and so on.
Shooting tiny objects at a very close distance has its joys, but also brings complications that we must deal with. In this article, we’ll take a more in-depth look at these issues.
Use your own lens, a Macro lens, or add-ons
The simplest solution is to purchase a specialized Macro lens. At the same time, it’s the most expensive solution because Super Macro lenses frequently cannot be used for other types of photography. A classic example is the Canon MP-E 65mm/2.8 1-5x Macro with a maximum focusing distance of about 31cm. You can forget about using it for portraits and landscapes.
Luckily there are other options available. The majority of them operate under the assumption that you own an interchangeable lens camera. But if you don’t, you can get close-up filters based on your specific type of camera. There are also close-up lenses that screw into the universal filter thread of your camera. You can picture both as acting like a magnifying glass in front of the lens, enlarging the image before sending it on.
For interchangeable lens cameras, extension tubes are common and attach between the normal lens and camera body. This way, only an enlarged cutout from the center of the image is sent to the sensor, magnified according. What’s more, the focal distance range moves significantly closer to the camera, hence making it unable to focus in the distance.
Teleconvertors work in a similar way, even though Macro magnification is more so secondary in these lenses. Their high price tag makes them impractical to purchase solely for Macro photography.
A useful trick is the use of a reverse lens, where all you need to do is add an affordable reversing ring to your existing equipment.
We shouldn’t forget even the simple cropping of the photo on a computer. Today’s devices have tons of megapixels, so the loss of even a few million pixels may not matter.
By combining the above options, you may get an even more intense magnification. For instance, for the majority of the photos in this article, I’ve used a 100mm Macro lens with 1:1 maximum magnification with the option to focus to infinity, to which I’ve added a total of 65mm in extension tubes, and finally, a 2x teleconverter. This way, I got a maximum magnification of approximately 4:1.

Problem one: loss of image quality
For every extra piece of equipment you add to your setup, you are enlarging the image along with its imperfections. For this reason, before starting to shoot, I recommend you find out what range of f-numbers gives you the best picture using your lens and its add-ons. For me, it was around f/4 to f/5, but when increasing or decreasing the depth of field, I found myself needing to readjust.
Naturally, the higher quality the lens is that you are starting out with, the better. With a lens that is just barely passable under normal conditions, adding extension tubes may give you a Macro shot, but it will be blurry or full of color problems.
Problem two: loss of light
The majority of adaptors reduce the amount of light that travels to the sensor. Adding more adaptors only increases this loss of light.
In my case, the Canon 100/2.8L IS Macro has a standard maximum aperture of f/2.8. After focusing at the minimum distance for Macro photography, it behaves like an f/5.6 (essentially with built-in extension tubes). This means there will be four times less light. After adding the set of extension tubes, it’s eight times less, and when I add the teleconverter, we’re talking about a loss of light of 32 times compared to the starting point. The aperture is still set to its lowest f/2.8, so if I wanted to use f/8, the level of light would decrease by a total of 256 times! That’s like photographing with an aperture of f/45.
A light source placed at a short distance will luckily only greatly increase in strength, so all you need to do is get very close to the photographed item. If you’re not afraid to use a tripod, you can use a long exposure to compensate for the loss of light.
In my case, the source of light was a remote, external flash. Fans of Macro photography also like using a ring flash. Diffused light is more pleasing than a directional light straight from the flash, so I used a small softbox or a piece of paper in front of the photographed object.
Problem three: lots of camera shake and nothing is in focus
Depth of field at this distance is truly tiny. The problem is not only sharpness, but also keeping the plane of focus in the right place. When shooting handheld it’s simpler to manually set the minimum distance beforehand and then with slow movement get the object into the plane of focus.
For more precise results and consistency, it’s best to use a tripod. Even here, camera shake is an issue, so use a delayed shutter and prepare yourself for more complicated focusing. A number of cameras are also able to connect via the computer or smartphone, so those that are ultra tech-savvy can potentially control the shutter, settings, and even focus remotely.

For those of us that aren’t proud owners of tripod heads with Macro rails, it’s often more practical to move the item than adjust screws on the tripod.
Helicon Focus is a specialized app for the pros. It allows you to automatically take a number of photos with only slightly adjusted focus and then connected them all into one image on the computer. For each image source, only the sharpest part is used and together it results in a picture with a much larger depth of field than would be possible with the camera alone. This technique is referred to as focus stacking.
Let the natural world inspire you
The most typical subject of Macro photography is the natural world. Details of insects in particular are an all-time favorite. I chose a more static setting, the world of spices.

Canon R5, Canon EF 100/2.8L IS Macro + extension tubes + 2x TC, 1/200 s, f/5, ISO 100.
Another suggestion I’d add is to use a dark base (in our case a piece of black cloth). When experimenting with a white plate, it reflected light from the flash. Even though the plate isn’t visible in the photo itself, it functions as an intensive reflector and significantly lowers contrast.

You can easily get pictures of other spices in a similar manner.

If you’ve ever wondered what a sesame seed looks like in detail, here is an enlarged cutout of the shot above:

Other items from nature can also be fascinating, such as the detail of a seashell below.
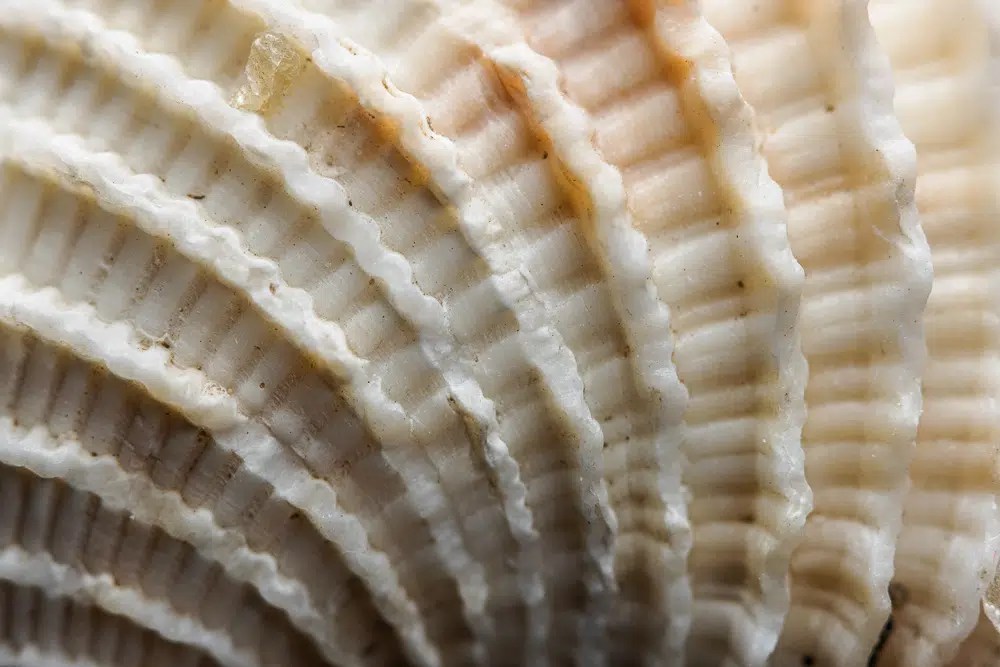
Canon R5, Canon EF 100/2.8L IS Macro + extension tubes + 2x TC, 1/200 s, f/5, ISO 100.
You’ll get this unique effect with a light that shines through the item towards the lens. This can bring delicate seashells to life.
Canon R5, Canon EF 100/2.8L IS Macro + extension tubes + 2x TC, 1/200 s, f/5, ISO 100.
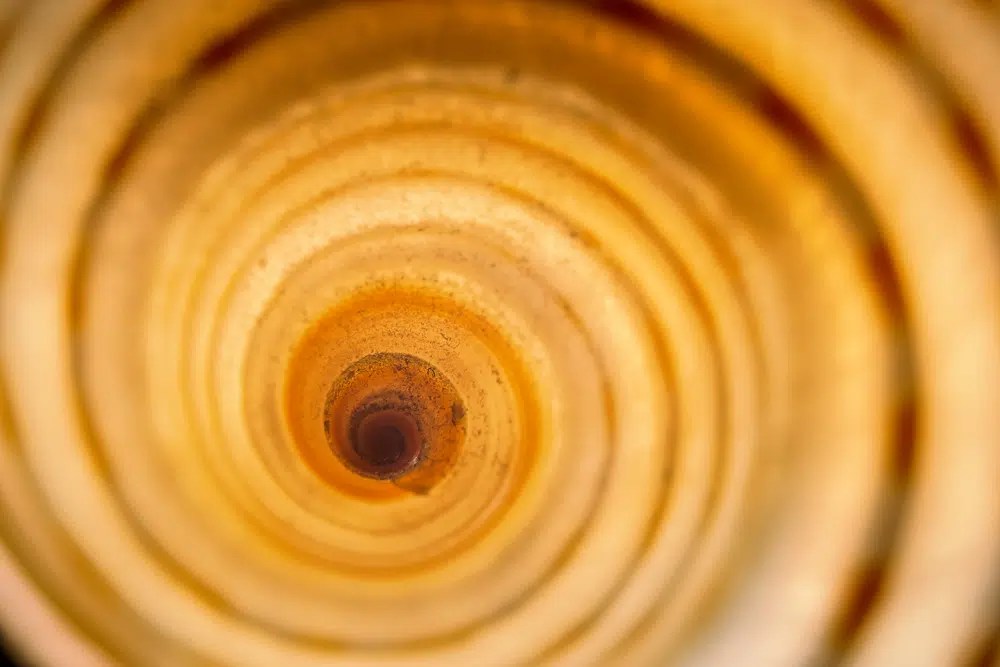
A similar process also works with other objects. In the following example, we used a thin orange slice:

Canon 5D Mark IV, Canon EF 100/2.8L IS Macro + extension tubes + 2x TC, 1/200 s, f/16, ISO 100.

Include man-made objects
When nature doesn’t catch your eye, it may be worth having a look around your own house. Some examples to inspire you can be found in the picture below.

Super Macro is your gateway to a whole new world
No matter what you choose in the end, you will be surprised at your brand-new perspective on everyday items. It may just be that something won’t be able to be photographed the way you imagined it. Then again, there will be times when you’ll discover fascinating possibilities. All you have to do is try.
Ultra-macro Photography Explained
The 5 Steps to Taking Ultra-Macro Photos
This technique outlines how Jiri and his team take some of the world’s highest resolution and detailed macro photographs. While they wouldn’t claim they’re the best at it, I think the basics of the process are all there for any artist or scientist to take some of the most amazing insect and macro photographs you’ve ever seen. Here are the 5 steps we detailed in the above video.
Step 1: Have the Proper Setup

Jiri and Andrew use a few microscopes to take their photos. The most powerful one is the above metallurgical microscope that has a DSLR and DSLR adaptor connected to the computer to allow them to take photographs of the insects. This microscope allows them the have a bit larger distance between the insect and the objectives. This isn’t possible with traditional microscopes.
The next big step is having a solid table that won’t shake. They have a marble slab on a heavy wooden desk with rubber legs to prevent shake.
Step 2: Prepping the Specimen

Jiri told me that he thinks this is the biggest and most important step. Small flecks of dust, as he explains, can completely ruin the image of a specimen. Andrew even told me that at times he’ll spend upwards of half and hour prepping each insect. This is done either by dabbing each one off with a paper soaked in ethanol or by carefully adding some white elmer’s glue and then pulling it off once it’s slightly dry.
Step 3: Lights and Diffusion

The next big ingredient is making sure the light comes in as diffuse as possible. They do this by adding Vellum around the subject. This is the material you’d buy as tracing paper or to make wedding invitations with. Sometimes they’ll add two circular rings of this diffusion material to make the light spread out as much as possible.
Step 4: Take the Photos

Believe it or not, but this is the simplest step. It doesn’t matter how you take the photos. They use canon’s built in EOS Utility on the computer to snap the photos. The real key is to snap a photo, move the focus slightly and snap another. For small insects of around 1mm they may take about 70 photos and then proceed to stack them together.
Step 5: Stack the Macro Shots

The stacking process is also pretty simple. You can purchase Helicon Focus (about 30 USD), drop the photos in, and click a single button to let it stack them together. In less than a minute you’ll have a completely stacked image, ready to play with!
In conclusion
By outlining a handful of the most common mistakes macro photographers make, hopefully you can sidestep these pitfalls and capture great close-up shots instantly! Good luck…
Resources
photographylife.com, “Everything You Need to Know About Macro Photography.” BY SPENCER COX ; adorama.com, “Top 15 Macro Photography Tips.” Peter Dam; naturettl.com, “8 Common Macro Photography Mistakes You Should Avoid.” By Ross Hoddinott; untamedscience.com, “Ultra-macro Photography Explained.”; learn.zoner.com, “Super Macro Photography: Discover the Magic of Close-up Macro Photography.”;